How to Enable Lightbox for Kadence Image Advanced Block
Kadence Image Advanced Block is a powerful tool for creating visually appealing content in WordPress, offering various customization options to enhance your website’s design. One feature that can significantly improve the user experience is the Lightbox effect.
Enabling Lightbox for Kadence Image Advanced Block allows your visitors to view images in a larger, overlay window without navigating away from the current page.
In this article, we will walk you through the process of enabling Lightbox for Kadence Image Advanced Block.
Table of Contents
Video: How to Enable Lightbox for Kadence Image Advanced Block
Watch the video on How to Enable Lightbox for Kadence Image Advanced Block.
Step-by-step process on How to Enable Lightbox for Kadence Image Advanced Block
Here is a step-by-step process on how to enable the lightbox effect inside Kadence.
Step 1: Install and Activate Kadence Tools
Before enabling the Lightbox feature, ensure that both the Kadence Theme and Kadence Blocks are installed and activated on your WordPress site.
You can use this link to access these Kadence WP tools.
Step 2: Add or Edit the Kadence Image Advanced Block
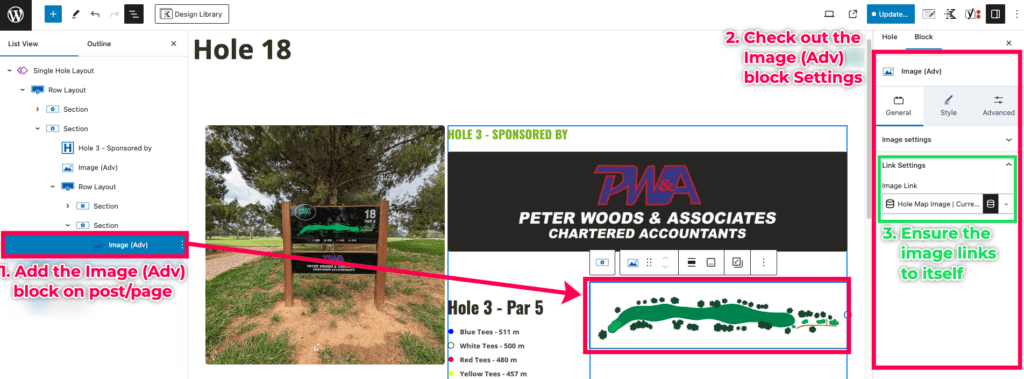
Once Kadence Blocks is active, navigate to the post or page where you want to enable the lightbox effect for the Kadence Image Advanced Block. Open the post/page in the WordPress editor.
If you have not added the Kadence Image Advanced Block yet, you can click the “+” button to add a new block and search for “Image (Adv)“. Select the Kadence Image Advanced Block and add it to your content.
After adding the block, add the image that you would like to apply the lightbox on. Navigate to the block settings and ensure that the image links to itself.
Step 3: Enable Lightbox
After setting up the Advanced Image block, we must enable lightBox within the Kadence Theme Customiser settings. To do this,
- Access Your WordPress Dashboard: Return to the WordPress admin dashboard.
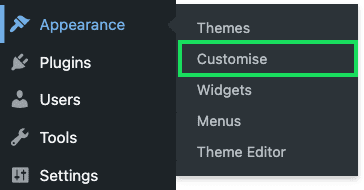
- Open Kadence Theme Customiser: Go to Appearance – Customise to open the theme customiser.
- Turn on Lightbox: Inside the theme customiser, go to General – Performance. Turn on the Enable Lightbox switch as shown below.
- Sace changes: Click Publish to save the changes.

Step 4: Test the Kadence Lightbox Effect
- Open the post/page where you are using the Advanced Image block.
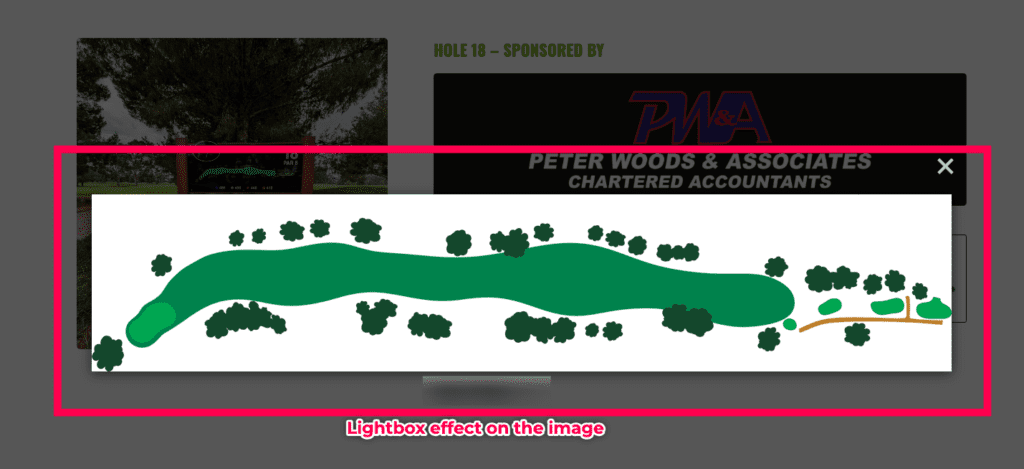
- Click on the image being rendered by the block.
- The image should now open in a larger overlay window, providing a more immersive viewing experience without navigating away from the content.
Conclusion
Enabling Lightbox for Kadence Image Advanced Block is a simple yet effective way to enhance the presentation of images on your WordPress site.
Following the steps outlined in this guide can provide your audience with a more engaging and user-friendly experience.
At MRK WP, we offer support for the Kadence theme and its plugin as part of our WordPress Care Plan service. Reach out to us if you need a WordPress Care Plan for your website.
Don’t forget to follow us on YouTube and leave a comment if you have any questions or suggestions for how-to guides with Kadence Pro.