How to Add Google Tag Manager to Kadence
If you use Kadence WP, you can use Google Tag Manager to manage your website’s tags and tracking codes more effectively.
Google Tag Manager is a tag management system that allows you to easily add, remove, and update tags on your website without editing your website’s code.
This guide will walk you through the steps to seamlessly integrate Google Tag Manager with your Kadence-powered WordPress site.
Table of contents
- Video: How to Add Google Tag Manager to Kadence
- Step-by-step process on How to Add Google Tag Manager to Kadence Theme
- Step 1: Enable the Header/Footer Scripts Addon
- Step 2: Set Up Your Google Tag Manager Account
- Step 3: Get Your Google Tag Manager Container Code
- Step 4: Integrate Google Tag Manager with Kadence
- Step 5: Clear sever cache and test Scripts
- Step 6: Add Tags and Triggers
- Step 7: Submit New Changes
- Step 8: Review your tag configurations
- Conclusion
Requirements
Before you proceed, here are some of the requirements you will need for this setup.
- Google Account: To create a Google Tag Account, you need to have a Google account.
- Kadence Pro: You need a Pro version of the Kadence WP theme, which comes with the Header/Footer scripts addon that is essential in this set-up.
More about Google Tag Manager
Google Tag Manager (GTM) is a free tool from Google that allows you to easily manage and deploy various tracking codes and scripts on your website without requiring direct access to the site’s source code.
Tags are small pieces of code that can be used to track user behaviour, measure the effectiveness of marketing campaigns, and more.
Check out the Exploring the Role of Google Tag Manager article for more information on GTM.
Video: How to Add Google Tag Manager to Kadence
Watch the video on How to Add Google Tag Manager to a Kadence website.
Step-by-step process on How to Add Google Tag Manager to Kadence Theme
Here are the steps on how you can add Google Tag Manager to your Kadence website.
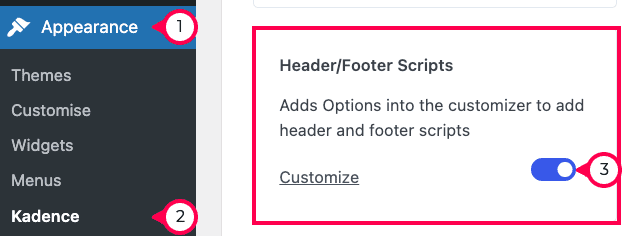
Step 1: Enable the Header/Footer Scripts Addon
Log into your WordPress Admin dashboard area. Go to Themes – Kadence – and activate the Header/Footer Scripts Pro Addon. This Pro Addon is available only on the Kadence Pro Theme version.
Header/Footer Scripts Pro Addon will enable you to tag scripts inside your website’s header and footer.
Step 2: Set Up Your Google Tag Manager Account
- Visit Google Tag Manager: Go to the Google Tag Manager website and sign in with your Google account. You must create a Google account if you don’t have one.
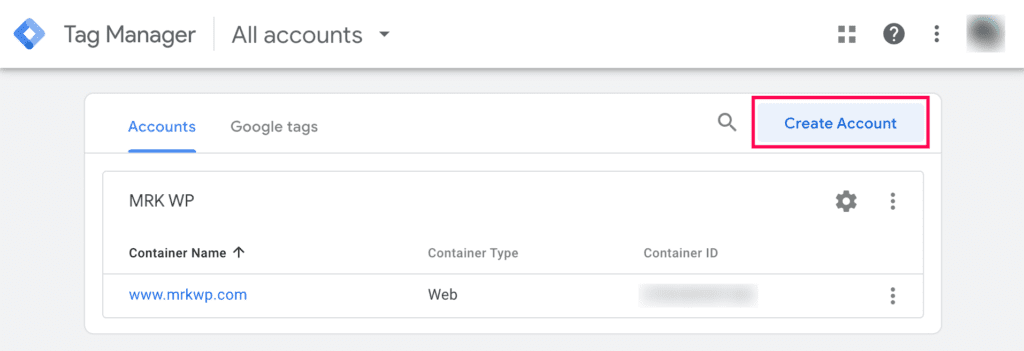
- Create an Account and Container: Click the Create Account button to set up your first Google Tag Account and Container.
- Fill in the Create Account and Container Form: To create the Google Tag account, enter the account name and select the country.
- Container Setup: Enter the container name and select the target platform for the Container Setup. A container is a virtual space that holds all the tags for a particular website.
- Submit the form: Click the Create button and accept the Terms of Service to complete this process.

Step 3: Get Your Google Tag Manager Container Code
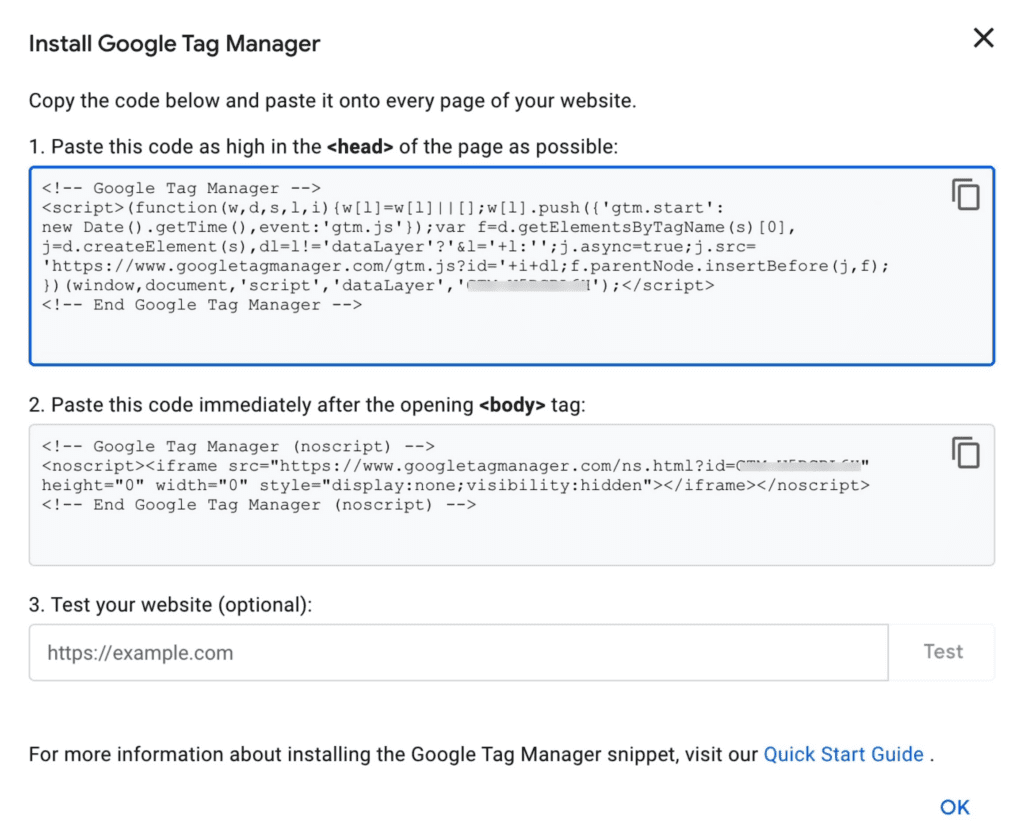
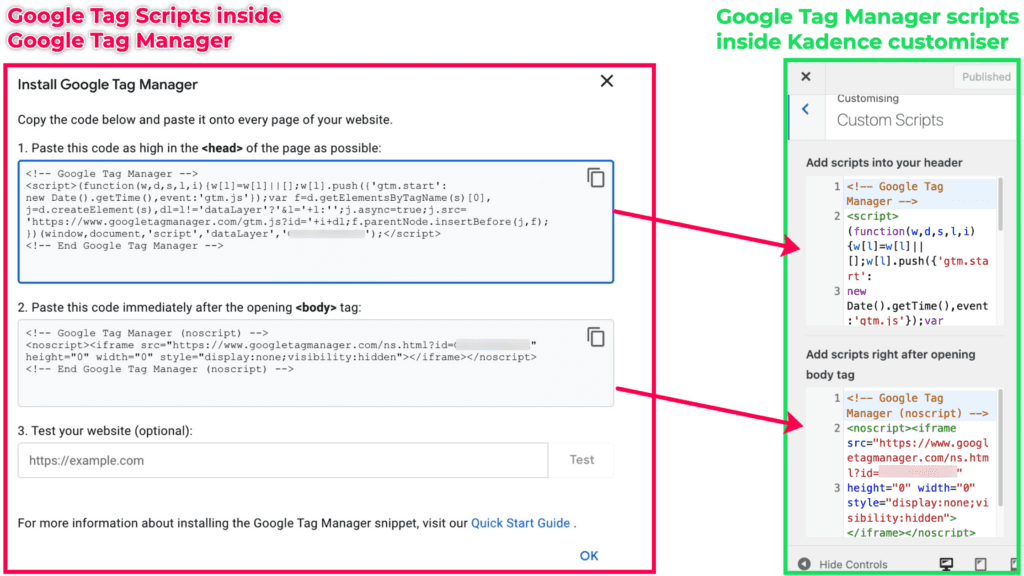
- Retrieve the Container Code: Google Tag Manager will give you code snippets after setting up your container. These code snippets need to be added to your Kadence WordPress site.
Step 4: Integrate Google Tag Manager with Kadence
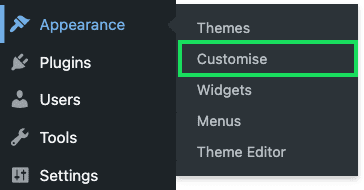
- Access Your WordPress Dashboard: Return to the WordPress admin dashboard.
- Open Kadence Theme Customiser: Go to Appearance – Customise to open the theme customiser.
- Open Custom Scripts Section: Within the Customiser, go to Custom Scripts.
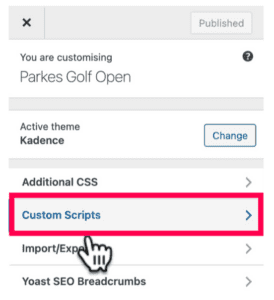
- Add Google Tag Manager Code: Paste the Google Tag Manager code snippets inside the Custom Scripts into the appropriate sections, that is to say, in your header and opening body tag, as shown below.
Step 5: Clear sever cache and test Scripts
- Test for the Scripts: The next step is to clear the server cache. When you clear the server cache, it removes the old cached files that do not have the tracking code, hence creating new files with the updated code.
Clearing Cache
Check out our article on Clearing your Browser Cache to learn more about cache at length.
- Test for the Scripts: Return to Google Tag Manager and add the website’s URL to test if the scripts work. You will see a green check mark confirming a positive test if the scripts work.

Step 6: Add Tags and Triggers
- Create Tags in Google Tag Manager: From your Google Tag Manager dashboard, create tags for the services you want to track; in this case, we will create a tag for the website.
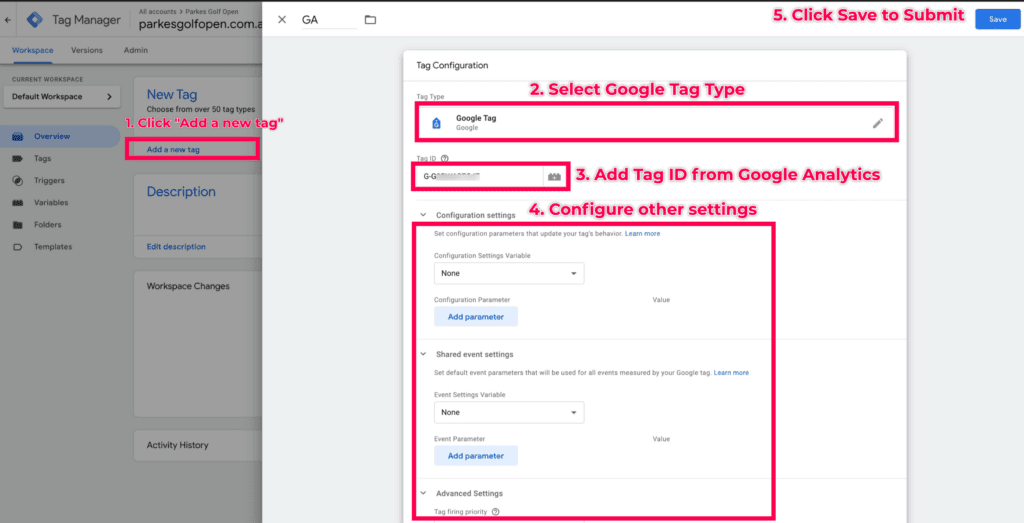
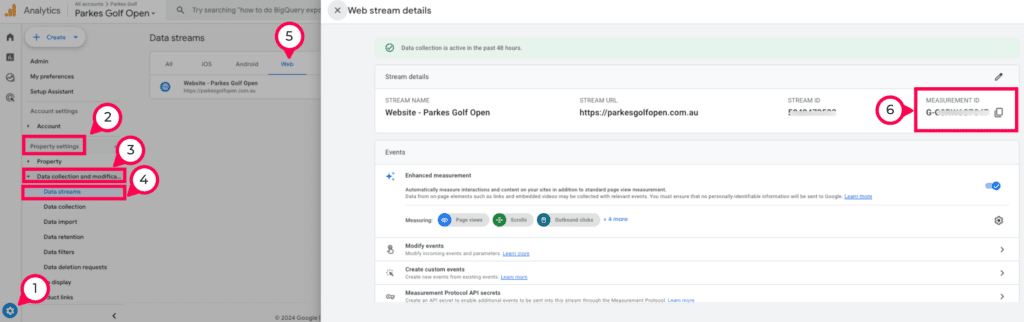
Tag ID from Google Analytics
To get the Google Analytics Tracking code ID, log into your Google Analytics account and go to Settings – Property settings – Data collection and modifications – Data Streams – Web and copy Measurement ID.
If you have not set up Google Analytics, check out our article on How to set up Google Analytics in Kadence WP Theme.
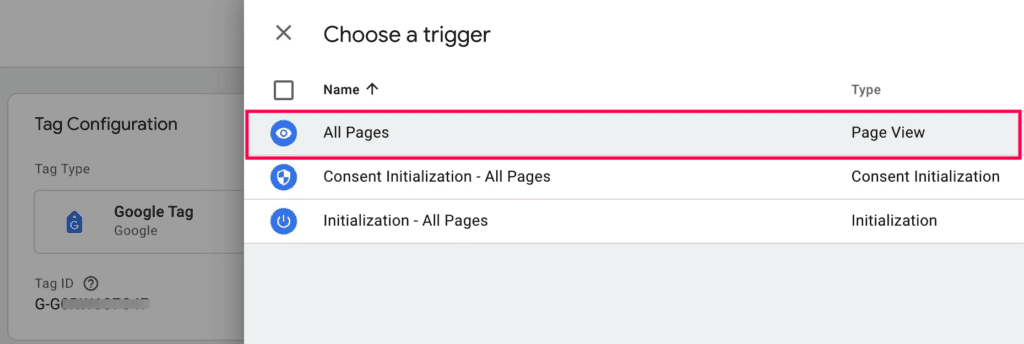
- Set Triggers: Associate triggers with your tags to specify when they should be activated. For this guide, we will set the trigger on pageviews.
Step 7: Submit New Changes
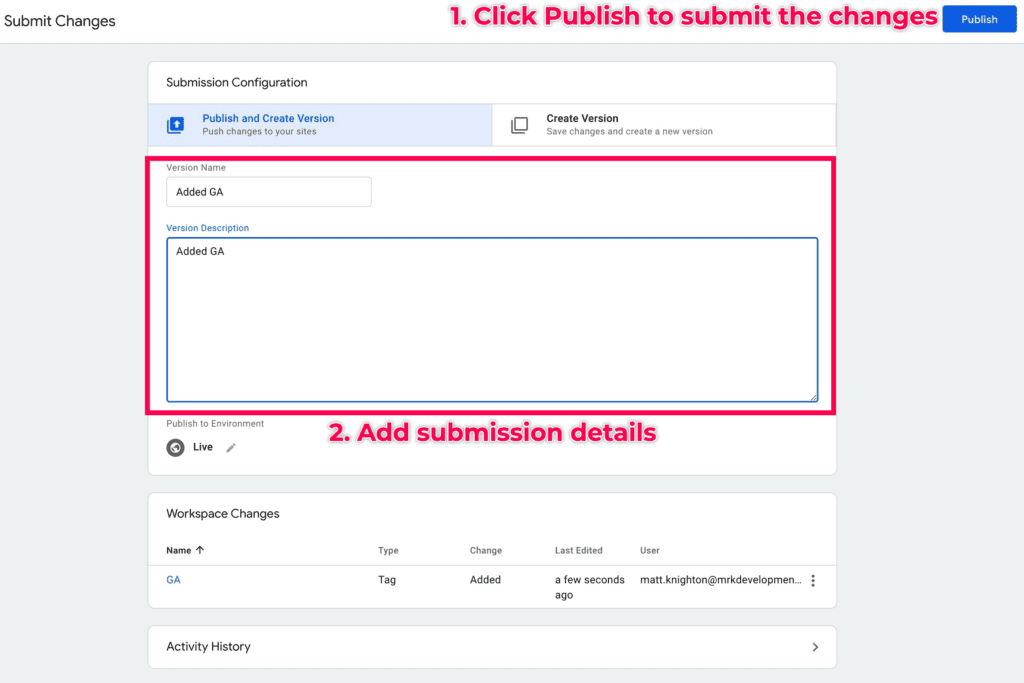
You must publish the changes after creating the tag and adding its trigger. To do this, Click the Submit button at the top right-hand corner of the screen.

Fill in the Submission Configuration form by adding the version name and description. Click Publish to submit the changes.
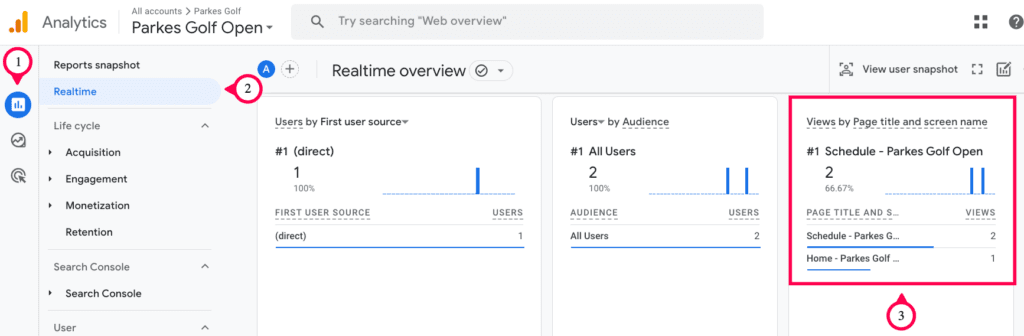
Step 8: Review your tag configurations
Review your tag configurations inside Google Analytics real-time reports to confirm that everything is working. Live traffic will be captured inside your Google Analytics if all is okay.
Conclusion
You have successfully integrated Google Tag Manager with your Kadence WordPress site. Centralizing your tracking codes and tags gives you more control over your website’s analytics and marketing efforts. Remember to regularly review and update your tags in Google Tag Manager as your website evolves.
At MRK WP, we offer support for the Kadence theme and its plugin as part of our WordPress Care Plan service. Reach out to us if you need a WordPress Care Plan for your website.