Editing Phase
In this guide, we shall look at;
- Working with images in an Article
- Internal Links and Backlinks
- Enable Social Media
How to check and edit image file names and Alt Text
Adding Images to Article
To make your articles more visually appealing, you should include images. Featured images are used as header or thumbnail images for the article. Inline images are placed directly in the text of an article.
This lesson will show you how to create and add images to your articles in WordPress.
How to create featured and inline images
There are several ways to create featured and inline images for your blog posts. We use Canva for most of our designs. This user-friendly graphic design tool makes it easy for anyone to create professional-looking visuals.
You can create great designs with Canva’s free account. Here is a step-by-step guide to creating designs in Canva.
How to upload your designs to WordPress
Once you have created your designs with Canva or any other design tool, you need to upload them to WordPress.
- The first method is to use the image block to upload it directly to your post. To do this, follow these steps.
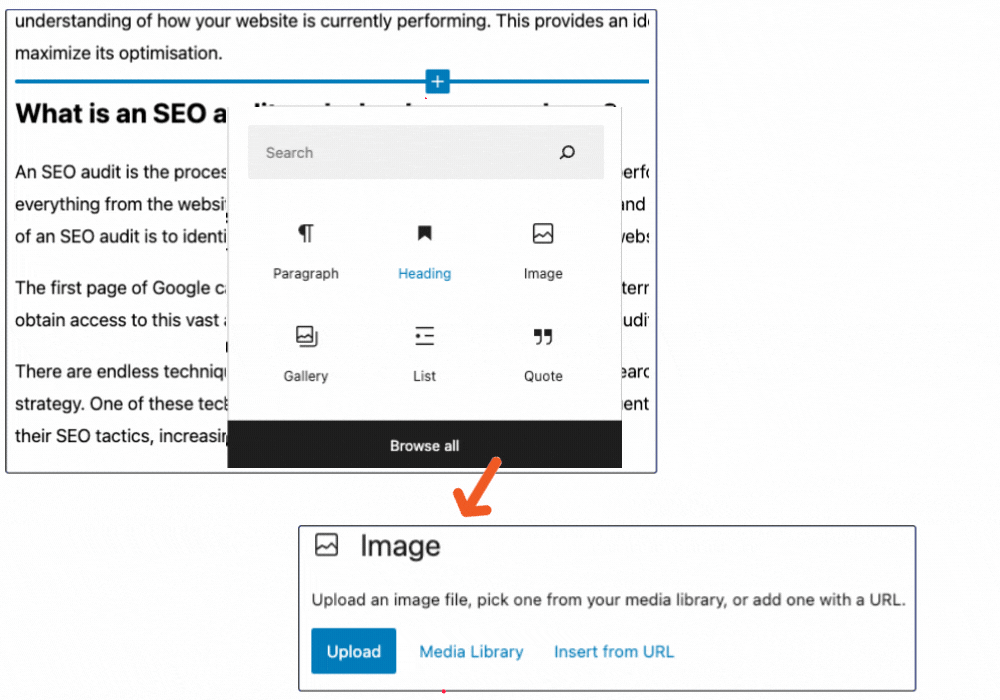
- Go to the WordPress editor of your post and click on the “+” button. This will open the blocks section.
- Search for the image block and click on it. Another window will pop up with three options; “Upload”, “Media Library”, and “Insert from URL”.
- You can use the “Upload” option when the image is saved on your computer.
- Use the “Media Library” option when the image is saved in the WordPress media library.
- You can use the “Insert from URL” option if you have the image’s URL link.
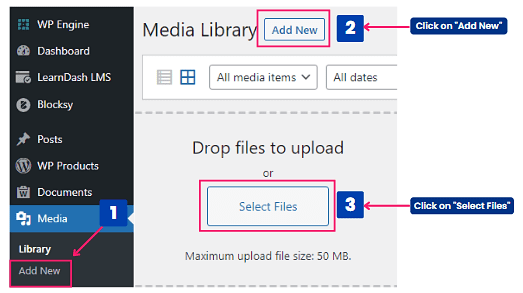
- The second method is to upload it to the WordPress Media Library and add it to your post later. To do this, follow these steps.
- Go to the “Media” section in your WordPress dashboard.
- Click on the “Add New” button.
- Choose “Select files” and upload the image file from your computer. Once the image is uploaded, you can add it to your post.
Some Helpful Links
Take a look at these other links for more information.
How to check and edit image file names and Alt Text
Before uploading images to your site, you must check the image file names to ensure they are correct.
Correctly named images provide search engines with clues about the contents of images. When search engines know what the images are about, they can display them as relevant results on the internet. Hence driving traffic to your website.
How to edit image file names
By default, you can’t edit image file names within WordPress. Always revise the image file name before uploading it to your site.

Steps to edit image file names:
- After downloading an image, go to the file or folder on your computer where the image has been saved.
- Right-click the image, select the rename option, type a new name, or edit the existing name. This works on both Mac and Windows.
- Save your changes and then upload the image to your WordPress site.
Steps to add or check image alt text
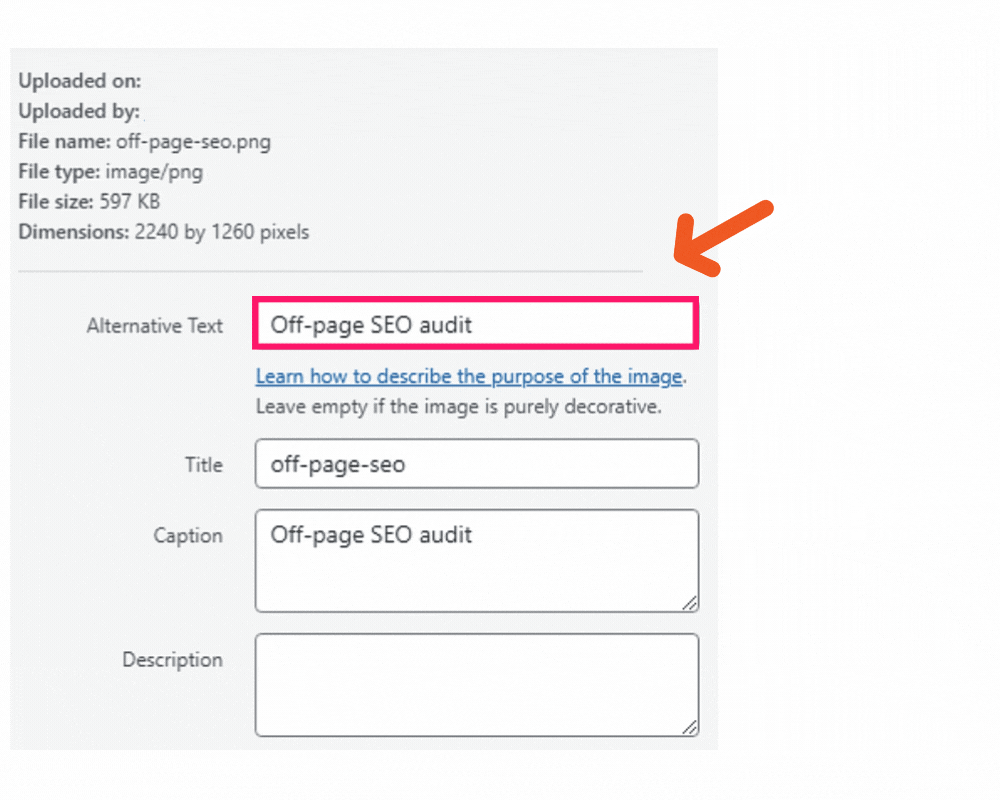
Alt text, also known as alternative text, is the description of an image. This helps search engines interpret the contents of the image. It also enables the visually impaired to access information through screen readers.
To check for alt text in WordPress, follow these steps:
- Go to the WordPress Dashboard.
- Click the “Media” menu item.
- Then click “Library” if your image has already been uploaded to WordPress.
- Please search for the image you want in the media library and click on it.
- A form will be displayed on the right-hand side of the image. This is where you fill in the relevant information.
If the image has not been uploaded to the website, follow these steps:
- First, go to the WordPress Dashboard.
- Next, click the “Media” menu item. Then click “Add new” and go to “Select Files”.
- You will then choose your image and upload it.
- Once the upload is complete, go to step 5, as seen above.
Some Helpful Links
Take a look at these other links for more information.
Internal Links and Backlinks
Creating Internal links and Backlinks
Links are an essential component of any good SEO strategy. They help boost your site and page rankings in search engines. In this lesson, we will learn how to add relevant internal and backlinks to your article.
There are two types of links that we use in web content, internal and external links (backlinks).
Internal links
Internal links are hyperlinks that connect to other pages on the same website. As you create content, you can internally link to pages and posts on your site, that relate to a particular subject matter.
Backlinks
Backlinks are links directing users from one website to a page on another website. It is one way of providing extra information or resources to your readers.
How to add internal and backlinks to your blog article
1. Look through the paragraphs to find sections to which you want to add links. In the case of our article, we identified the phrase “image optimization” as a relevant anchor text for an internal link.
2. Next, click on the link button in the toolbar to add the link.
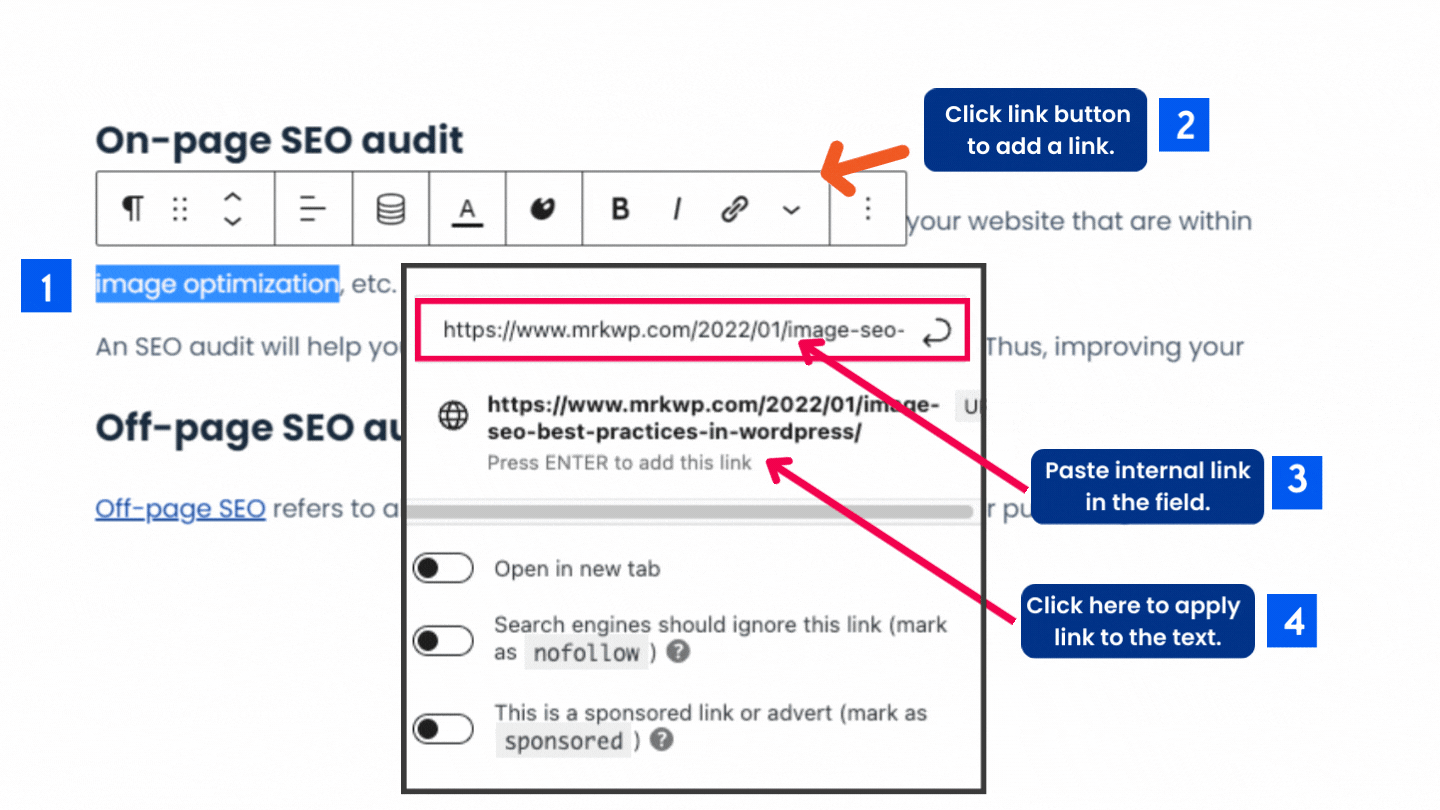
3. A window will pop up. Enter the link in the empty field at the top.
4. Click on the URL below the link field to apply the URL to your selected text.
Note
If the link is a backlink to another web page, always ensure that the link opens in a new tab.
3 tips for effective backlinks
- Use at least 3 to 5 backlinks for your content. That is enough for a single article.
- It’s recommended to link to credible sources with quality content. Otherwise, linking to just any website might hurt your search engine rankings.
- Link to websites in a similar niche or industry to you. Otherwise, linking to sites outside of your niche may hurt your website rankings.
Enable Social Media
Simply put, Social media is any digital tool that enables users to create and share their content with the public. In this topic, we shall look at how you can create social media previews for your article.
How to create social media previews
Social media previews are snippets of what your article’s image, title, and description will look like when you post it on a social media platform.
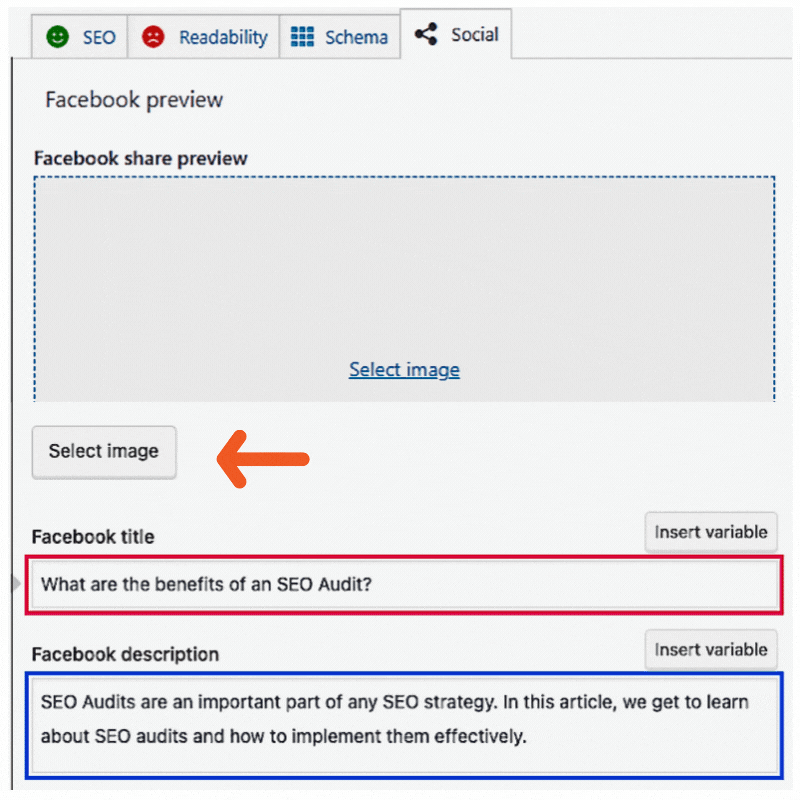
To create social media previews for your posts in WordPress, we use the “Social Preview” feature in Yoast.
- With the Yoast SEO plugin installed on your site, go to the WordPress block editor for your article.
- To access the “Social Preview” feature, scroll down the page in the editor to reach the Yoast meta box. Click on the “Social“ tab.
- A preview of your post will display. Click on the different fields to create custom images, titles, and descriptions.
To set a custom image, title and description, follow these steps.
- First, click “Select image” under either the Facebook or Twitter preview sections. This action will take you to the WordPress media library. Select your image.
- Next, enter the title name in the title field.
- Enter the post description in the description field. Click the “Update” button in the top right of the page to save your input.
You can follow the same steps in the Yoast sidebar on the right side of the editor. Go to the Yoast settings and scroll down the page to find “Facebook preview” and “Twitter preview.”
Note
If you do not set a custom post image, title, and description for the social media previews, the Yoast Plugin will automatically set them using smart defaults from your post’s meta data.
How to use social media share buttons
A social media share button allows people to share your content with others on social media. Social media share buttons normally appear at the bottom of a post or page as icons.
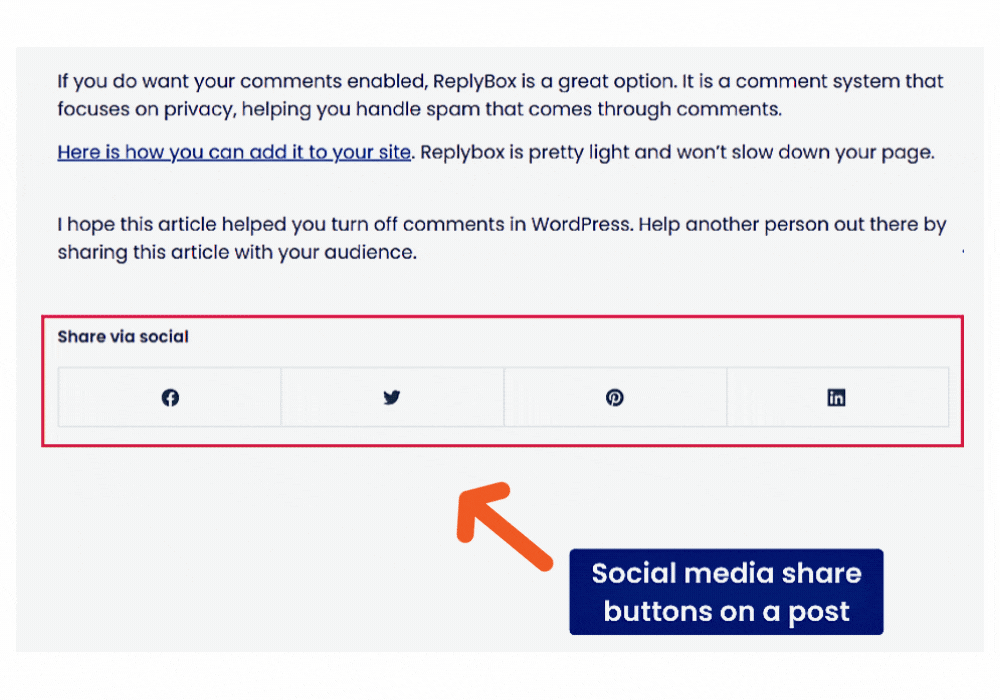
Here is one way to add social media share buttons on your page using WordPress blocks.
To share your post using any of the social share buttons, simply click on any of the buttons. Once the social page opens up, add a description, then share it on your platform.
Some Helpful Links
Take a look at these other links for more information.