How to Create a Custom Single Post Template in Kadence
Do you want to create a custom template for your WordPress custom post type? Well, Kadence Pro comes with the Kadence Elements Pro Addon that allows you to create custom layouts that you can roll out across your custom posts.
In this article, we will walk through the process of creating a custom template in Kadence by transforming a block pattern into o single post template.
We will also look at how you can turn off the block editor for your Custom Post Type to avoid confusing users who usually update block patterns instead of the ACF fields of the custom posts.
Table of Contents
Video: How to Create a Custom Template in Kadence
Here is a video tutorial on creating a custom single post template inside Kadence.
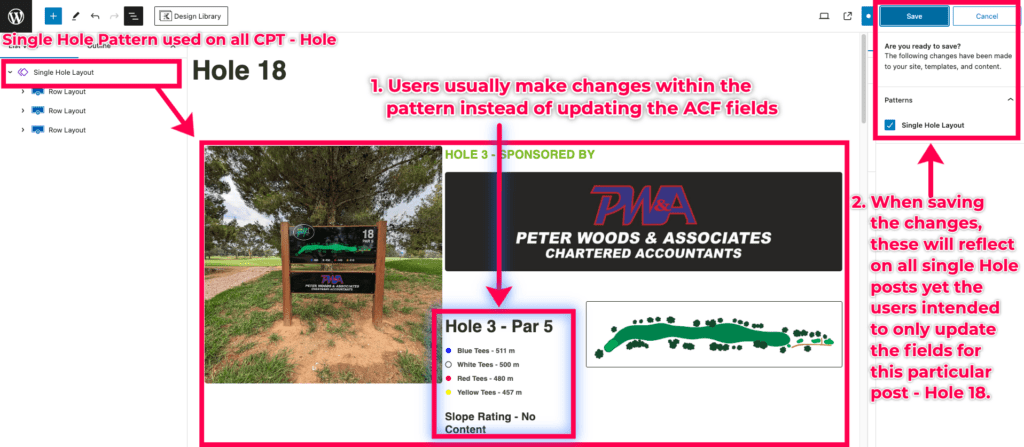
Why Transform a Block Pattern into a Single Post Template
In our Kadence tutorial series, we looked at how to map ACF Fields to Kadence Blocks in episode 4. We went ahead and created a block pattern for our layout that we applied across all our Hole single posts.
However, using the block pattern on each custom post is confusing when it comes to updating the post content.
- Users will usually update the CPT post content from within the block pattern instead of updating the ACF Fields section.
- In the end, this affects posts where this pattern is being used on your site.
Solution
To solve this, we need to create a separate template to replace the block pattern we currently use across the custom post type. We will use the Kadence Elements Pro-Addon to build this layout.
Later on, we will also need to turn off the Gutenberg block editor inside the post editor so that users can only update the ACF fields instead of getting confused with the current block pattern.
Follow the steps below as we guide you through this solution.
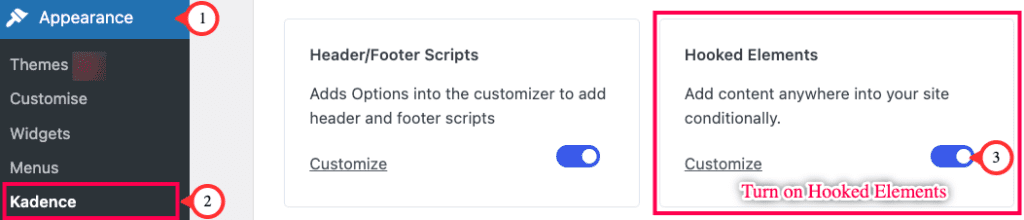
Step 1: Activate the Kadence Elements Pro-Addon
First and foremost, you will need to turn on the Kadence Hooked Elements Addon. This is Addon is available on the Kadence Pro Theme. To turn on the Hooked Elements,
- Go to Appearance inside WP Admin.
- Under Appearance, go to the Kadence sub menu.
- Look for the Hooked Elements section and turn it on the feature.
Step 2: Creating the Custom Template with Kadence Elements
The next step is for us to create a new Kadence Element. This will be the template for the single Holes pages.
- Go to Appearance – Kadence.
- Under Kadence, go to the Elements sub-menu.
- Click on the Add New button to create an Element.
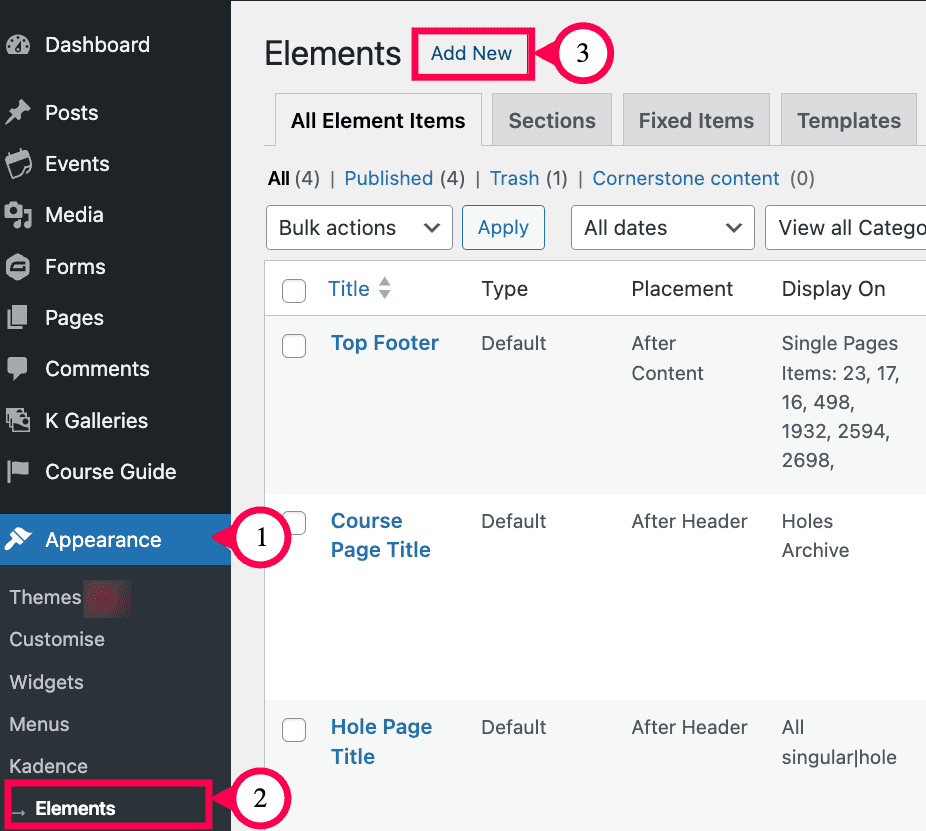
This will open the block editor from where we will start creating our custom template.
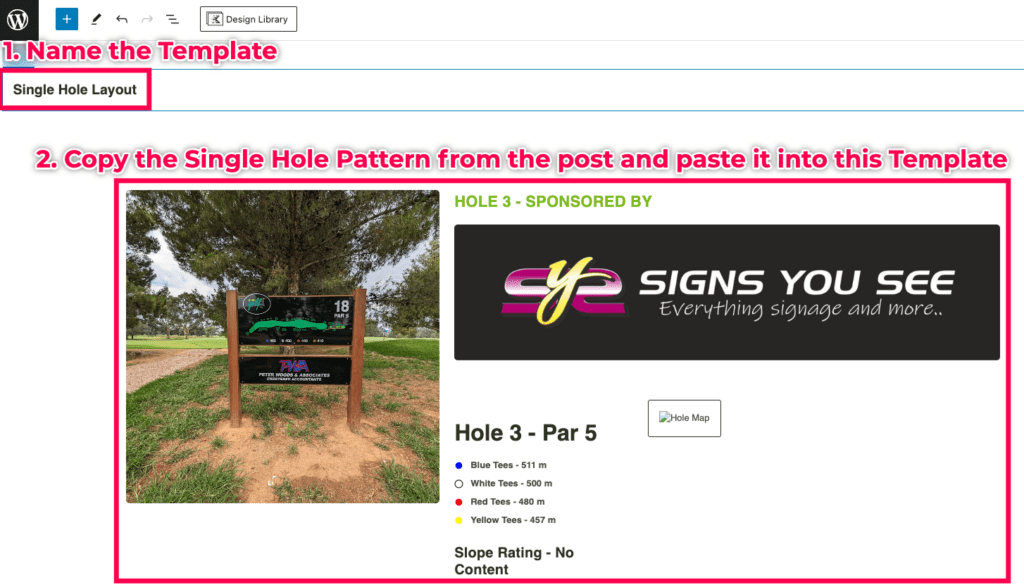
- Add a name for the Custom template.
- Copy the block pattern we discussed at the start of this tutorial from the single post and paste it into this template.
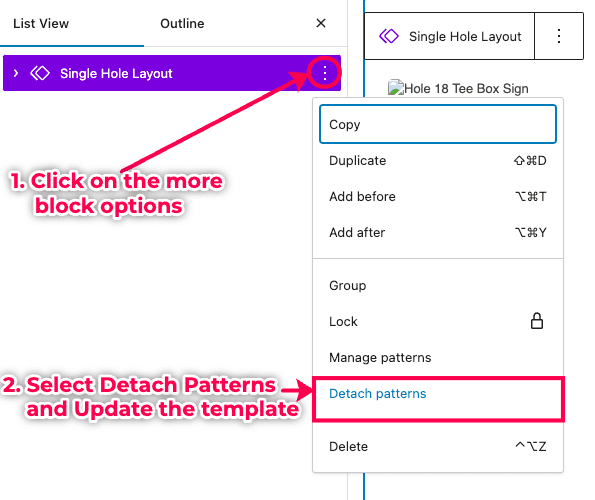
Step 3: Detach the Pattern
To prevent further changes/updates on the block pattern, we need first to detach it. This means that any further changes we will apply to these blocks and will not reflect anywhere else.To do this,
- Click on the ellipse/more options button for the block.
- Select Detach pattern.
- Click Publish and save the changes to the template.
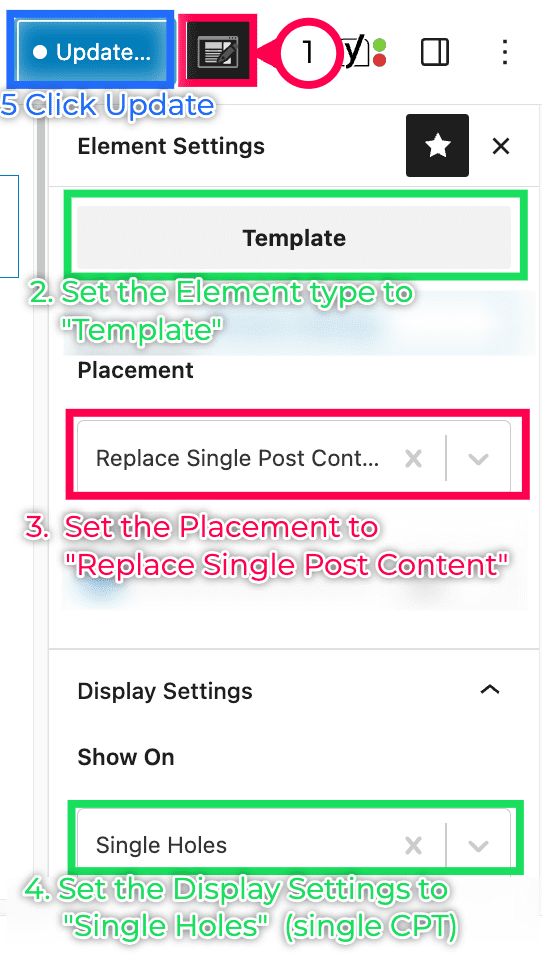
Step 4: Setting the Display Conditions
Now that our blocks are decoupled from the pattern, we are going to configure some settings and set display conditions for our Kadence Element.
- Click the Elements settings button.
- Set the Element type to Template.
- Set the Placement for the template to Replace Single Post Content. This means the template will replace all the content wherever it will be rendered.
- For display settings, select the element to display on Single Holes (this would be the single post for your CPT).
- Click Update.
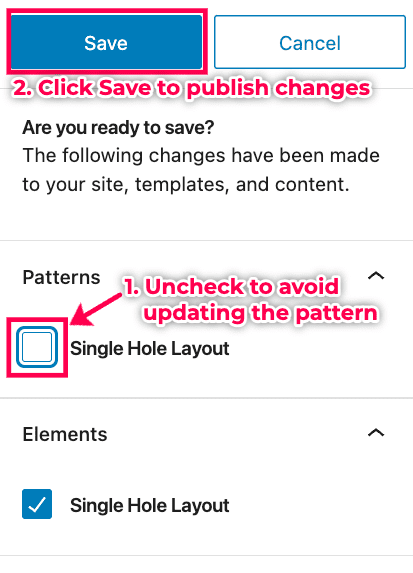
Step 5: Saving the Template
When you try updating, further saving options will show up;
- Uncheck the option to avoind saving changes for the pattern we detached. Leave the option to save Element’s changes checked as seen below.
- Click Save to publish your changes.
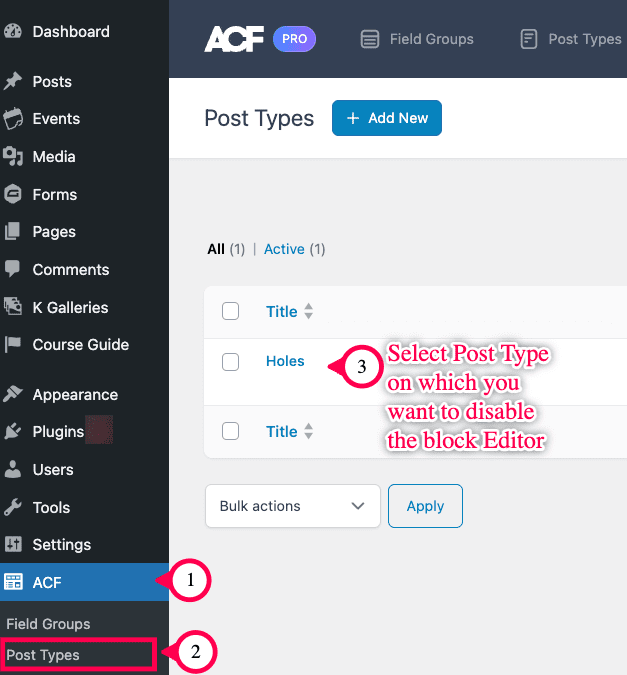
Step 6: Turn Off the Block Editor for Custom Post Type
After creating the template, we will turn off the block editor for the Custom Post Type as we had discussed earlier. If you are using the ACF Pro,
- From the WP Admin dashboard, go to ACF.
- Select the Post Type from the sub-menu.
- Select the post type whose block editor you are to disable.
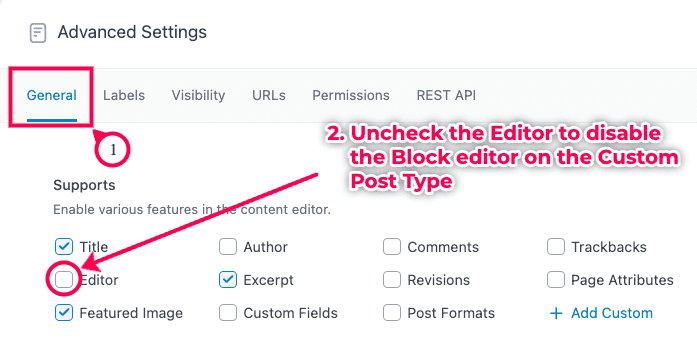
Look for the Advanced Settings section on the page.
- Go to the General Tab.
- Uncheck the Editor option to disable the editor on the Custom Post Type.
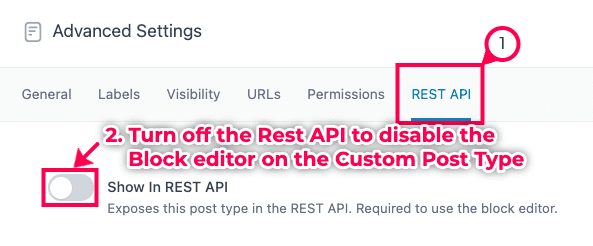
Still under the Advanced Settings,
- Switch to the REST API Tab.
- Turn off the REST API for the Custom Post Type.
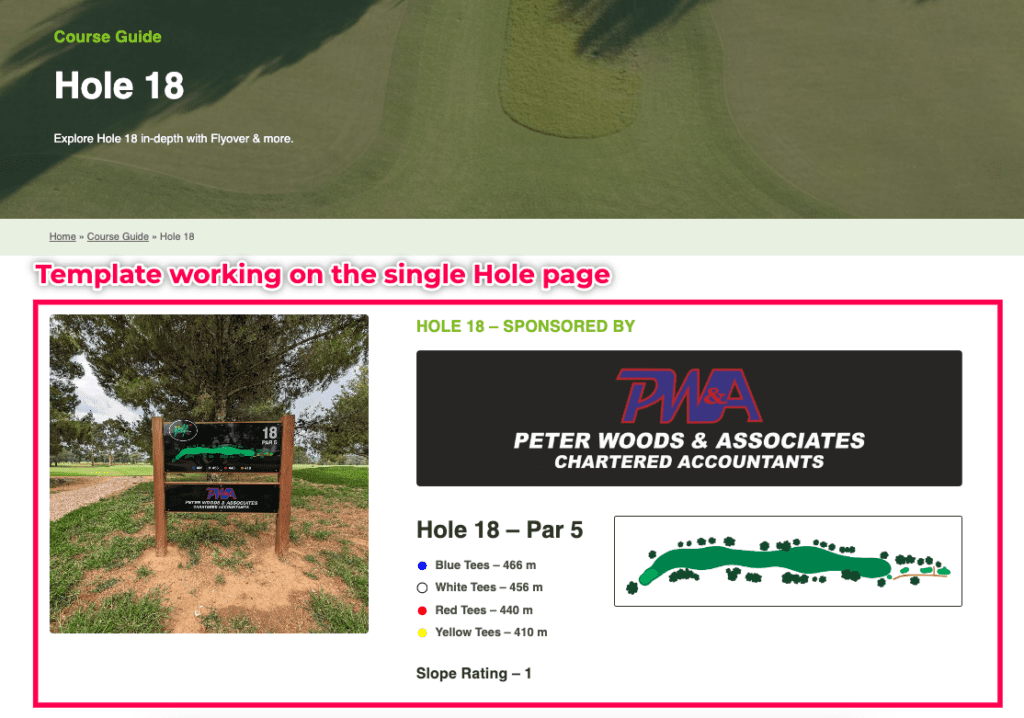
Step 7: Testing the Changes
Now that we have created the custom template and disabled the block editor for the custom post type, we have to test whether our changes are working.
To test for the disabled block editor, try to edit a post via the WP Admin. You will notice that block editor is no longer available for that post type.
This means users can now update only the values of a post via ACF fields section. There is no more confusion brought by the block editor pattern.

At the frontend of the website, open up several single post pages. You will notice that all the single your posts rendering the template you have just created.
Caution: Turning Off the Rest API

You should turn off the REST API for your Custom Post only after allocating the display conditions for the temple under Step 5.
If you turn off the REST API before setting the display conditions on your custom template, you will not have the option to render that template anywhere for that given Custom Post Type; that is to say, you will not be able to apply it to a single page for that Custom Post Type.
Conclusion
By following this tutorial, you can now create a custom template for your single Custom Post Type layout using Kadence Pro.
WordPress Care Plan with Kadence
MRK WP supports the Kadence theme and its plugin as part of our WordPress Care Plan service. We can build and help maintain your Kadence website. Our WordPress Care plan service also covers the cost of theme and plugin licenses for your Kadence sites.