How to Set Start and End Dates in Gravity Forms
Do you have a form on your website that is time-sensitive?
For example, an event registration form or competition entry form? In these examples your form will need to start / stops being available after specific dates.
In this tutorial we use the Gravity Forms date limit feature. We use this to schedule a registration form and discuss the steps involved.
Using this tutorial you will be able to schedule a registration or entry form by date range using Gravity Forms.
Table of contents
What is Gravity Forms?
Gravity Forms is a popular WordPress form builder plugin that makes creating and managing forms easy.
One of the numerous functionalities of Gravity Forms is the option to establish a specific timeframe for form submission. It limits users to only submit within that designated period.
When to set Start and End dates on forms?
The start date is, in this context, the date on which the form will be available on your website for submission. The end date is the date on which the form will no longer be available for submission.
We use the Start and End Dates setting to prevent users from submitting a form before or after a certain date. This can be useful if you use a form to collect pre-registration data.
You can use forms with start dates to collect feedback on new products or services. These forms will not be available until the product or service launch date.
Setting start dates on forms implies that users cannot make any submissions until the form is available on the start date.
Video: How to set start and end dates Gravity Forms
Watch the video tutorial on how to set the date limits in Gravity Forms.
Steps on How to Set the Date Limit
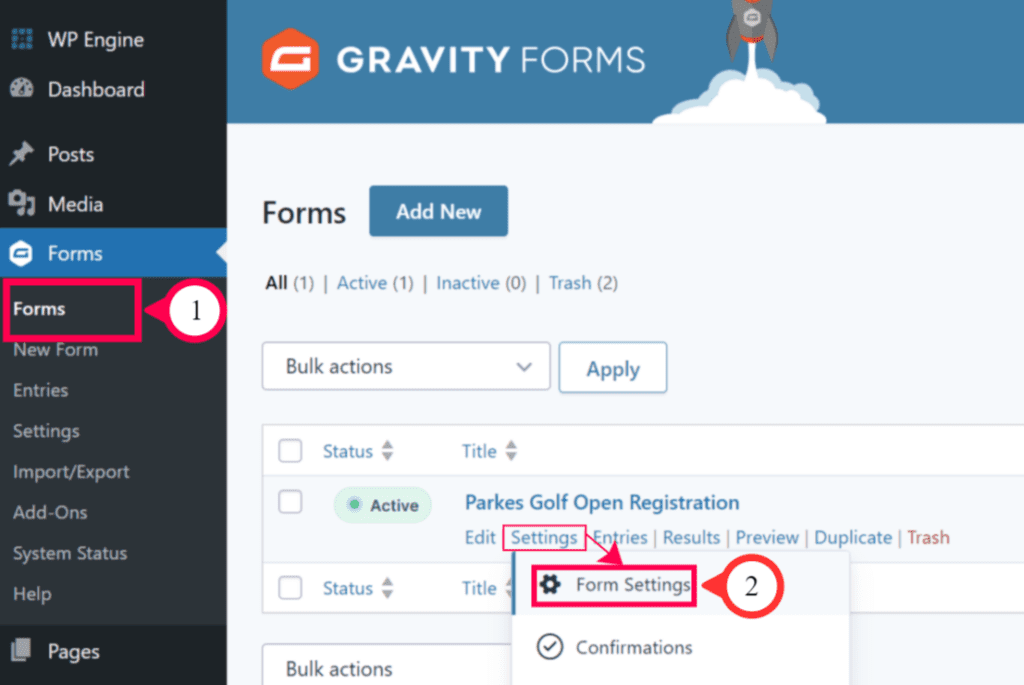
- Go to Gravity Forms > Forms and select the form whose submissions you want to limit.
- Hover on the Settings tab and select Form Settings on the drop-down.
- On the settings page, scroll down to the Restrictions section.
- Firstly, check the option to turn on the form scheduling functionality.
- Set the Start date and time for which the form should start displaying.
- Set the End date and time for which the form should stop displaying.
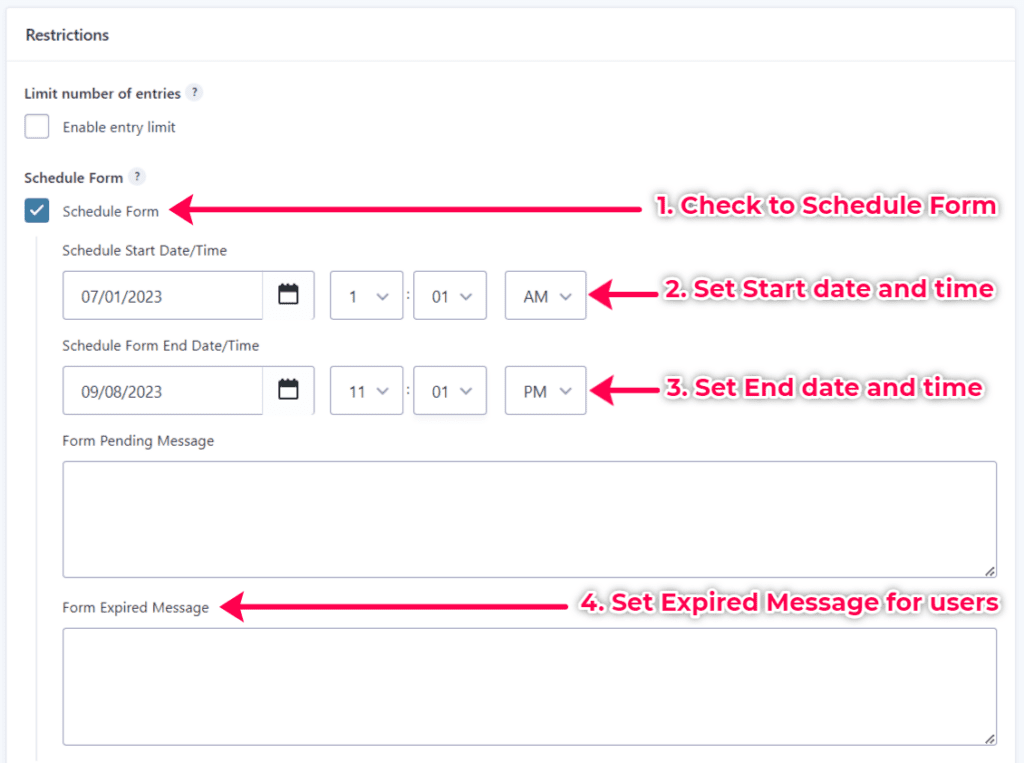
- Scroll to the bottom of the form settings page. Click the Save Settings button to save the changes.
With these steps above, you can schedule your Gravity forms to appear within the specific timeline. You do not have to worry about getting submissions before the registration date and after the deadline.
At MRK WP, we can set up and configure Gravity Forms as part of our WordPress Care plan service. This can ensure your website forms collect accurate and clean data from users who make submissions. Contact us today.
Frequently Asked Questions
The purpose of setting start and end dates for Gravity Forms is to restrict when users can submit a form. This can be useful for a variety of purposes. These include collecting feedback on a new product or service after it has been launched. You can also schedule a form to accept donations for a charity event during a specific time period.
To set start and end dates for Gravity Forms, you need to go to the Restrictions section in the form settings. In this section, you will see a checkbox for the Schedule form. Check this box and then enter the form’s start and end dates and times.