How to create multiple conditional headers with Blocksy Theme
Blocksy Theme is a powerful WordPress theme. It gives you complete control over the design of your website. One of the most impressive features is its ability to create conditional headers. You can create different headers for pages, posts, or even users.
Conditional headers are a great way to customise your website. They can make it more user-friendly. For example, you could create a different homepage header with only a call to action. You could also have a different header for your blog posts with a search bar.
This tutorial shows you how to create multiple conditional headers with Blocksy Theme. We will also provide some tips on using conditional headers.
Table of contents
Video Tutorial
Watch the video on how to use Blocksy Pro’s Multi-conditional headers.
What are conditional headers?
Conditional headers are headers that display only under certain conditions.
Blocksy Theme makes it easy to create conditional headers. All you need to do is create a new header and set the display conditions.
You can set the display conditions based on various factors. These could be pages, posts, user roles, or the device type.
Requirement
You must have Blocksy Pro Version on your website to create conditional headers. You can buy Blocksy Pro if you currently do not have it.
How to create multiple conditional headers with Blocksy Theme
To create multiple conditional headers with Blocksy Theme, you will need to:
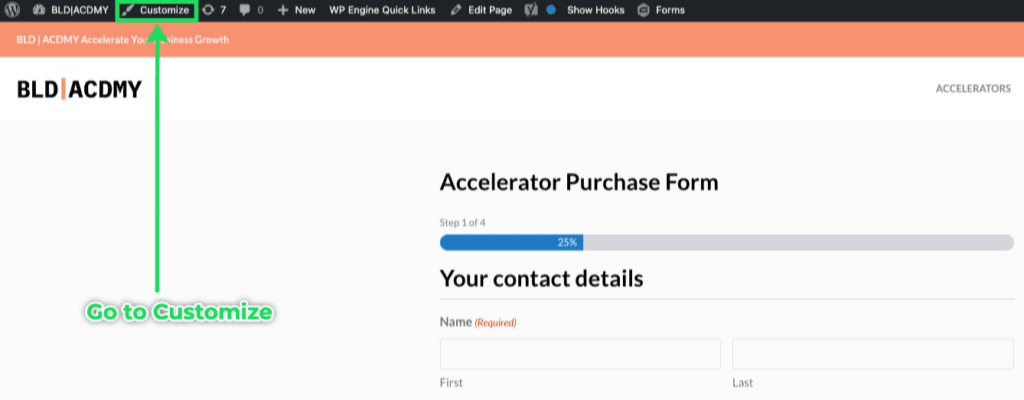
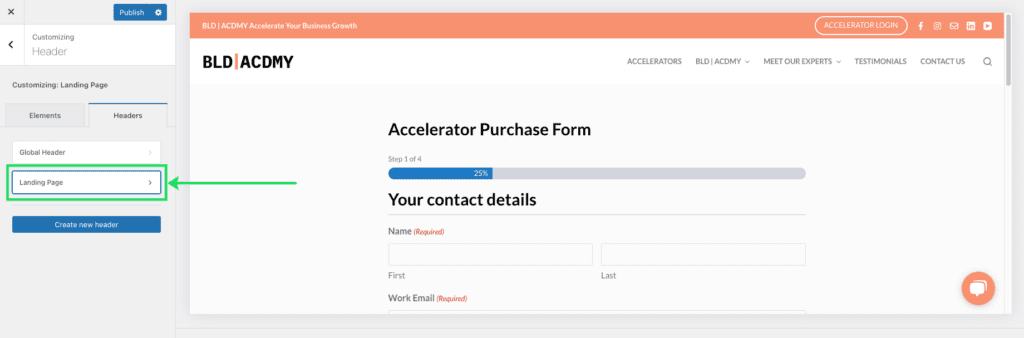
- Go to the Customizer.
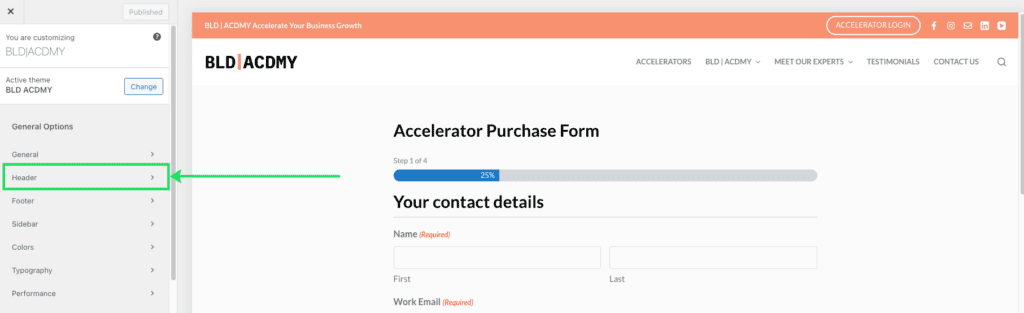
- Navigate to the Header section.
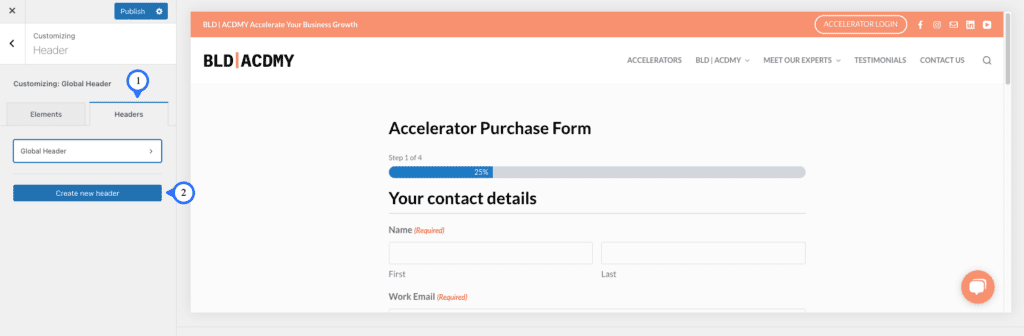
- Click the “Create new Header” button.
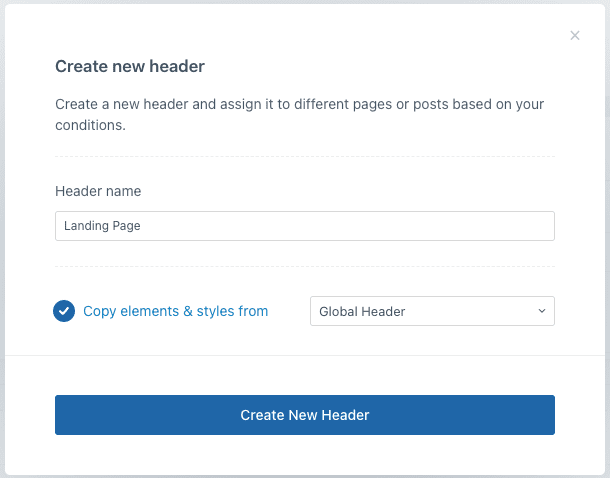
- Give the new header a name. You could copy elements from an existing header by checking that given option.
- Return to the list of headers and select the new header to make changes.
- Edit the new header.
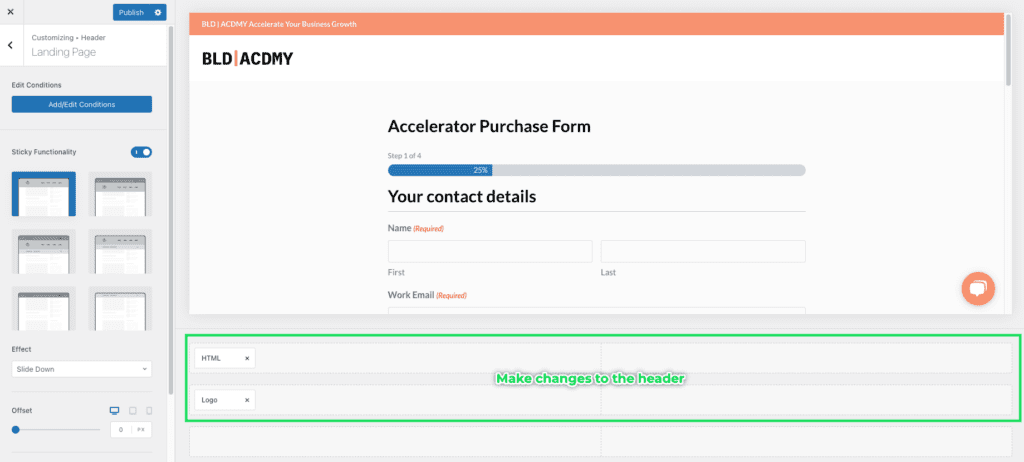
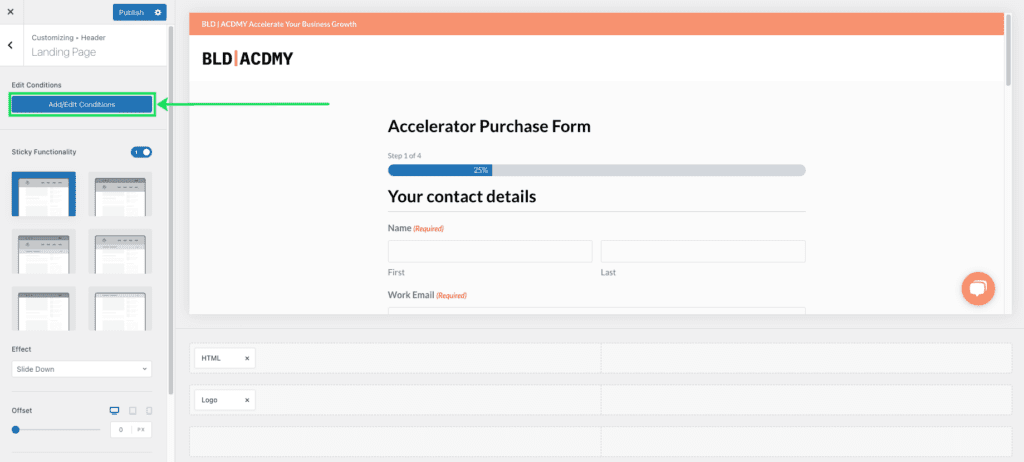
- To set the display conditions, click “Add/Edit display conditions”.
- Set display conditions. In this case, the new header will appear only on the Accelerator Purchase Form page.
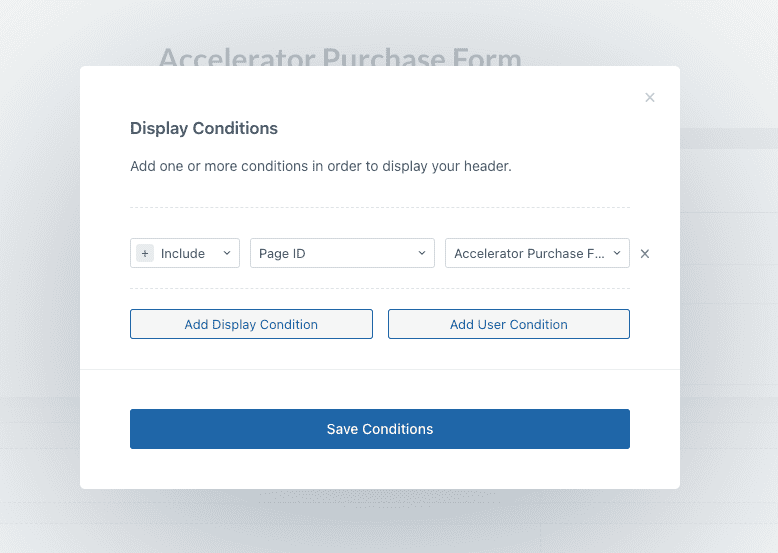
- Click the “Save Conditions” button.
- Click the “Publish” button to save the settings.
You can repeat these steps to create multiple conditional headers as you need.
Tips for using multiple conditional headers
You can use conditional headers when you want to;
- Improve the user experience of your website. You could create a different landing page header with a unique header. We have seen this in our tutorial.
- Target specific types of users. For example, you could create a header only displayed to logged-in users. You can have a header only displayed for users on mobile devices.
- Create a more visually appealing website. For instance, you could create a different header for each website section.
Conclusion
Conditional headers are a powerful feature that can customise your website. This can improve the user experience for your visitors. If you use Blocksy Theme, try out multiple conditional headers today on your website.
More Tips
Check out more tips from us on Blocksy Theme.