Post Editing
In this lesson, we’ll be looking at some important measures to implement, as we conclude our editing phase.
Here are the topics we’ll cover in this lesson:
- Correct Permalinks
- Meta Descriptions
- Mobile Responsiveness
Ensure your post has the correct permalink
Permalinks are also known as permanent links. These are the URL links to your posts and pages.
Checking your permalink in WordPress
1. Log in to your WordPress and navigate to your post in the text editor.
2. On the top right corner, you will see the settings button and click on it.
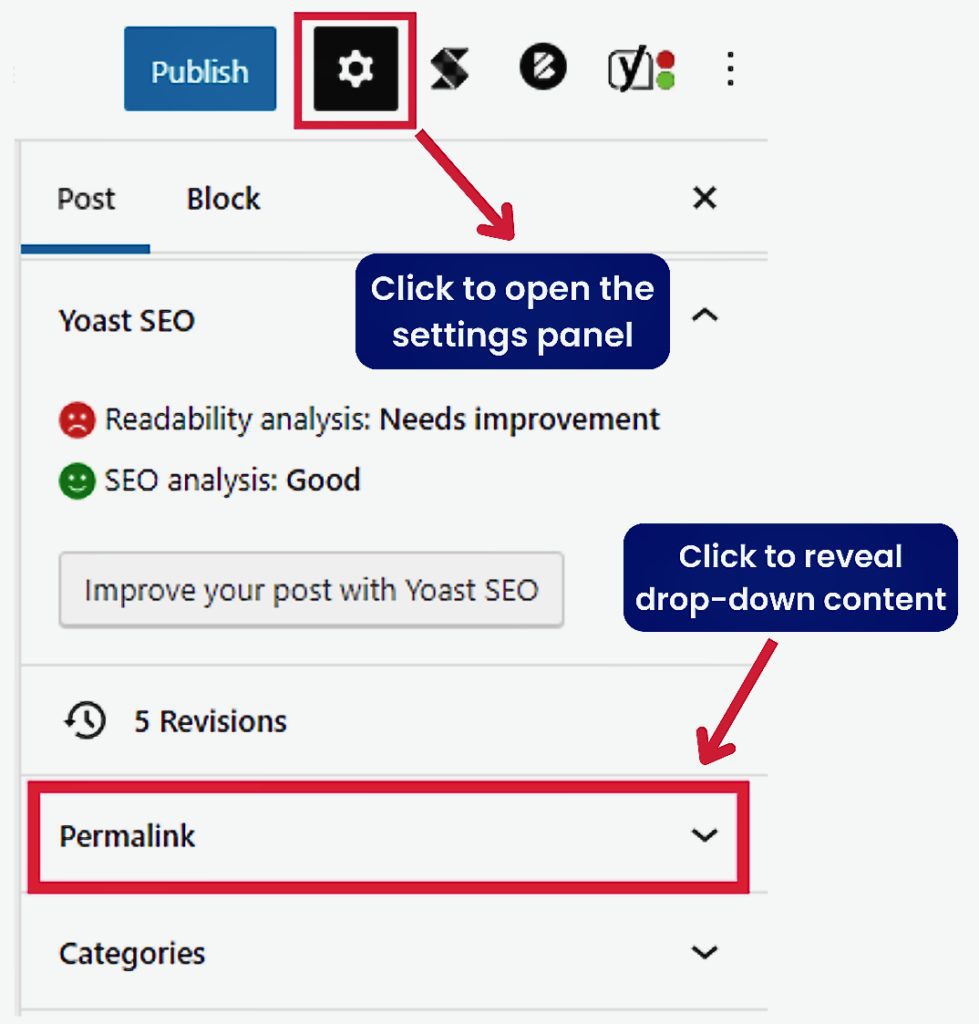
3. That action will display the settings panel. Now scroll down along the setting panel to find “Permalink.”
4. Click the drop-down button to display the permalink attributes.
The image below illustrates what our slug looks like. A slug identifies and explains the actual contents of a page.
You notice that ours looks a little bit weird. This is because we are working in a WP engine staging environment. But our final permalink will look like this: https://www.mrkwp.com/what-are-the-benefits-of-an-seo-audit.
Some Helpful Links
Take a look at these other links for more information.
Meta Descriptions
Writing a good meta description.
A meta description is a summary of the content of your web page. Search engines use it to display a “snippet” of your page in the search results. For example, this is what Google will show if you search for “MRKWP.”

How to add a post meta tag
1. Open your post in the WordPress editor. Scroll down to find the Yoast panel.
2. Navigate to the “Meta box” above Yoast SEO analysis. You will see an empty field to insert your post’s description.
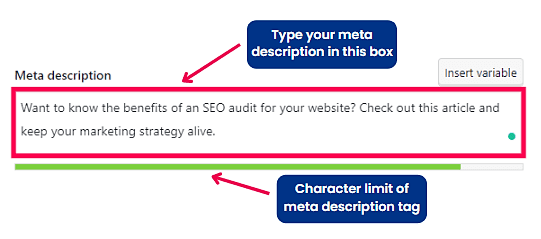
3. Ensure that it is optimised for SEO. Also, focus on Yoast’s character limit of the meta tag. If you exceed the allowed number of characters, it will warn you by changing to the color orange. Update to apply the changes.
Some Helpful Links
Take a look at these other links for more information.
Mobile Responsiveness
Ensure your post is Mobile Responsive.
Many people access the internet from their mobile devices. Hence, your posts need to be mobile-responsive. In this topic, we will learn how to check for mobile responsiveness.
1. Go to the WordPress text editor where you drafted your article.
2. On the right-hand side of the toolbar, click “Preview.”
3. A preview box will appear with different options. Click on “Mobile” to change the layout of your article. This action will launch the mobile preview of your article. It is what users reading your article on mobile phones will see.
4. Scroll down How to make a site Mobile Responsivenessyour article to ensure all texts and images fit nicely on the mobile screen. If it doesn’t, you will need to restructure the article again.
Some Helpful Links
Take a look at these other links for more information.