Setting Up Sites in WP Engine
Adding a Site to WP Engine
You can add either a new or an existing site to your WP Engine plan.
Here are the steps on how to add a site.
1. Go to “Add Site”
Adding a new site to WP Engine is very easy. Click the “Add Site” button at the top-right-hand corner to start.

2. Select Site Type
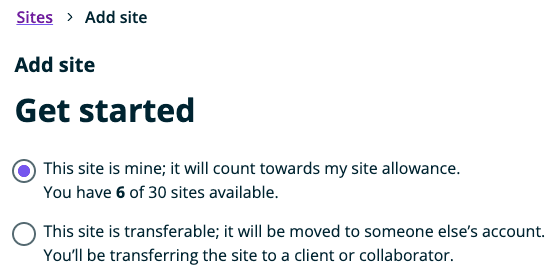
Select the types of site you will be setting up. A site falls under two categories.
- Personal site: – If the new site belongs to you, it counts under your site allowance plan.
- Transferable site: – If the new site will later be transferred to another WP Engine user. This site type does not count under your site allowance plan.

3. Site Setup Method
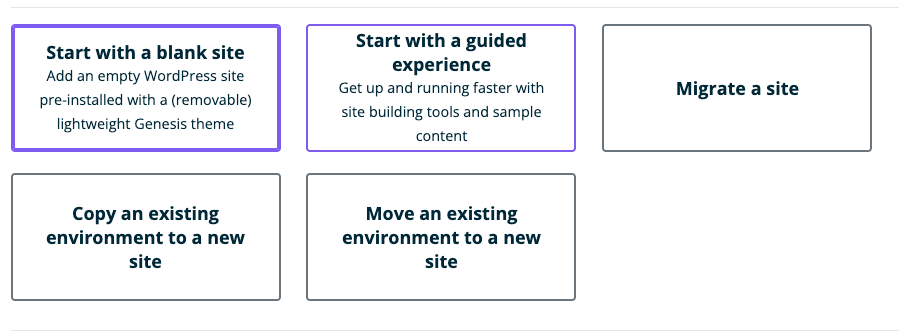
In this step, you select the setup you will use to start the site. There are five methods offered here;
- Starting with a blank site: An empty WordPress site with a Genesis Pro theme.
- Starting with a guided experience: Comes with site-building tools and sample content.
- Migrating a site: Moving an existing site from another host to WP Engine.
- Copy an existing environment to a new site: – Cloning an existing environment in WP Engine. That is, setting up a new site and preserving the old environment copy.
- Move an existing environment to a new site: – Shifting an existing environment in WP Engine. That is, setting up a new site and deleting the old environment copy.

4. Add site details
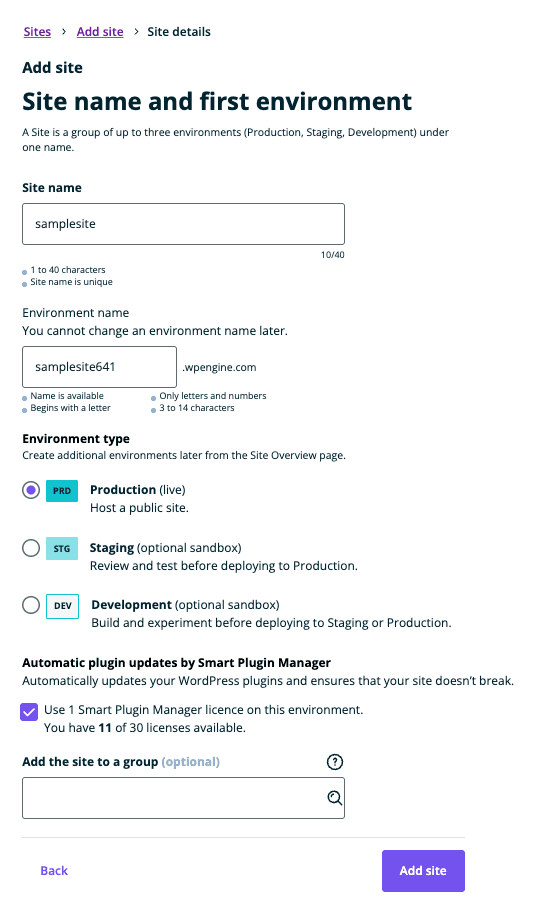
The next step is adding the following details about a site.
- Site name
- Environment name
- Environment type
- Install the Automatic plugin updates by Smart Plugin Manager – Optional
- Add site to a group – Optional

After filling in these details, click ‘Add Site‘ to finalise the process.
Migrating an existing site
For cases where you have an existing site and would like to migrate it to WP Engine. There are two types of migrations you could use;
Note
Here are links to extra resources and documentation on adding sites to your WP Engine hosting.
- How to build a new site on WP Engine
- WP Engine: Select or Change a Website’s Data Center
- WP Engine Transferable Sites and Environments
- WP Engine Automatic site migration
- WP Engine Manual migration process
- How to import a WordPress Database in WP Engine
- How to download WP-Content Folder
- How to migrate posts/pages between WordPress websites.
Adding Users to WP Engine
You can add other users or team members to your WP Engine. These could be your clients or your agency team members.
To add a user, follow the steps below.
Note
To add users, you should have the account owner status.
1. Go To Account Users Page
- Log into the WP Admin User Portal.
- Go to the “Users” menu item on the left-sidebar
- Click “Account Users”
- Click the “Add User” button
2. Fill in the form fields
- Fill in the Add user form and click the “Create user” button
3. Email Confirmation
The added user will receive an email confirming their WP Engine account and set up process.
Note
Here are some of the links to extra resources and documentation on how to add users to your WP Engine hosting.
