How to stop Gravity Forms spam when reCaptcha fails you
If you’re a website owner, you’ve probably used the Gravity Forms to power your forms. But what if Gravity Forms isn’t working correctly? In particular, what if the Google reCaptcha feature isn’t working to stop spam? This can be a major issue, especially if your site depends on forms for communication. The good news is that there is an easy fix!
In this post, we’ll show you how to fix the Gravity Forms spam issue.
Video tutorial on how to fix the problem
Written guide on how to fix the problem
The Captcha problem in Gravity Forms is a common one, but it can be fixed! Follow these easy steps to stop spam on your form today.
Before you start: This post assumes you already have Google reCatchpa added to your form. For how to set it up, click here!
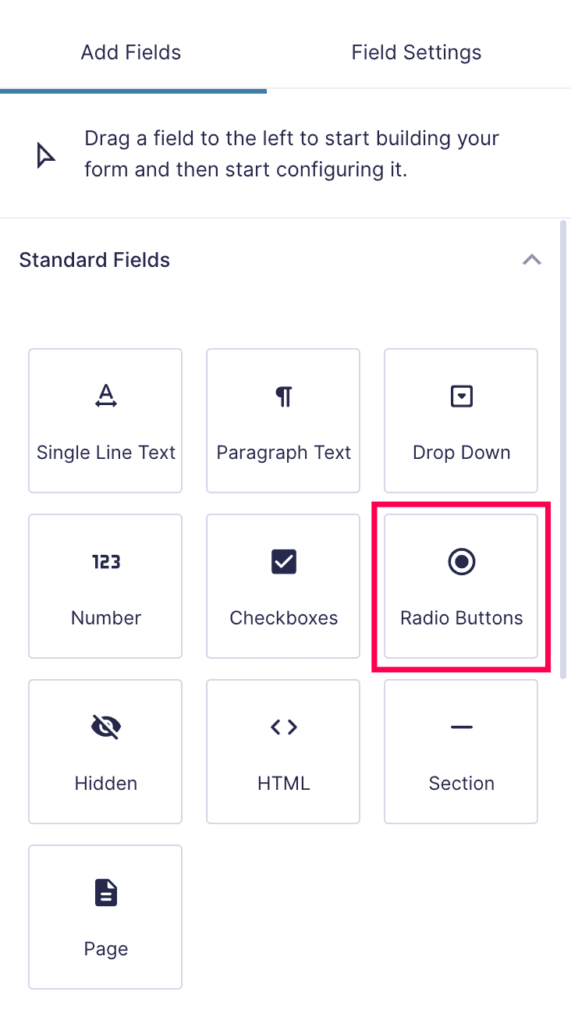
Step 1. Go to your form’s Edit page and add the Radio Buttons field to your form. Use drag and drop to place it above the Captcha field (which you have already added).
Step 2. Add the following settings to the Radio Buttons field:
- Field Label: Confirm you are real
- Description: Select ‘I’m a person’ and complete the Google Captcha to send the form.
- First Choice: I’m a spammer
- Second Choice: I’m a person
- Rules: select ‘Required’
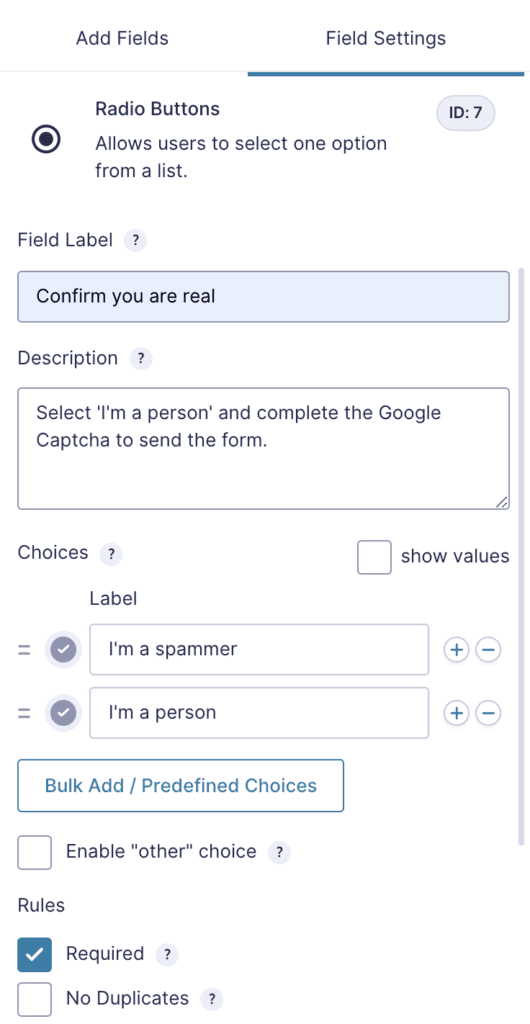
This will add a Radio Buttons field to your form that must be filled in order for the form to be submitted.
Step 3. Click ‘Save Form’.
Step 4. Go to your form’s Settings page and edit the Form Button field as follows:
- Enable conditional logic (which will expand more options)
- Select the options: ‘Show’ this form button if ‘All’ of the following match
- Select the options: ‘Confirm you are real’ – ‘is’ – ‘I’m a person’
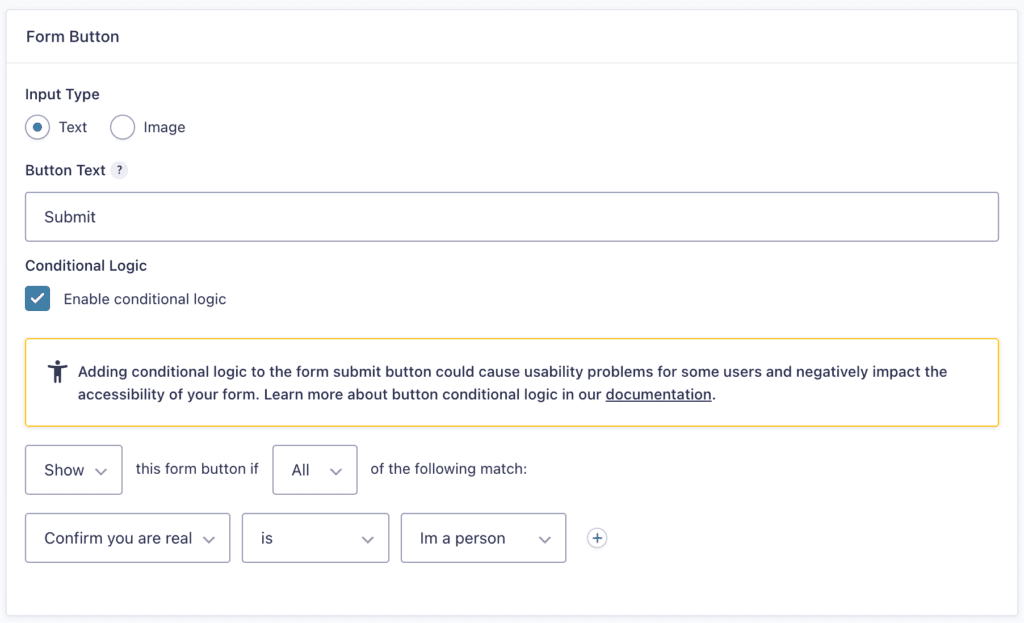
By adding conditional logic, the “I’m a person” button must be selected in order for your form’s Submit button show up and go through successfully! Which will stop most spam submissions.
Step 5. Click ‘Save Settings’ and enjoy your spam-free form!