Manual Site Updates
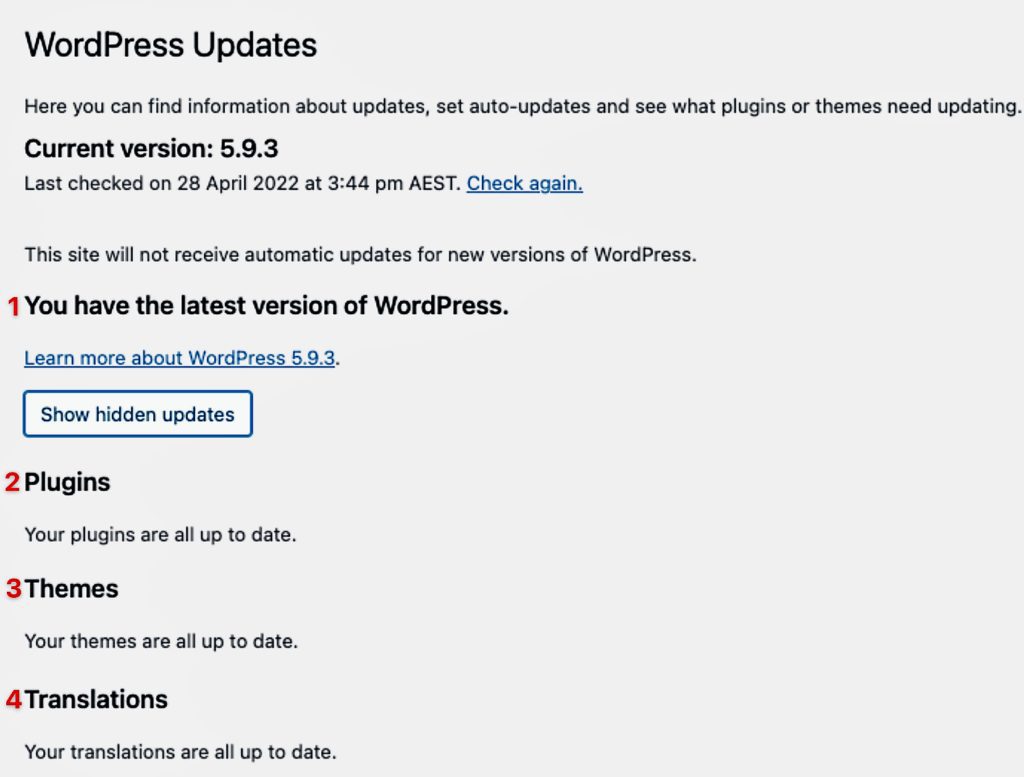
Smart Plugin Manager may not manage all site updates. Other updates such as WordPress core need a manual updating process.
These updates are essential for your site’s functionality and security.
Other website types that need manual updates include eCommerce sites and directory sites. Membership sites and other sites with ever-changing data also fall into this category. They all need keen observation during the plugin updating process.
We recommend you first roll out updates on the staging or development environment. Then, have these tested and roll them to the production environment.
This also caters for cases that the Smart Plugin manager could have missed. Such as any visual changes or errors to the site that only an eye observation can flag.
In this lesson, we will look at the steps of rolling out site updates manually on your site. These are;
- Select Website to Update
- Check Website Work Status
- Clone Production to Another Environment
- Create a Backup Point before an Update
- Update Site item.
- Testing the site after the Update
- Update other items on the site
- Final Touches On Staging
- Roll out Updates On Production
- Create a Note on the Updates
1. Select Website to Update
The first step is identifying the site that requires updates. As mentioned earlier, updates can fall under the following categories;
- WordPress Core updates
- Plugin updates
- Theme updates
- Translations

Note
Other updates, such as PHP updates, are made at the server level.
Having your website up to date provides various benefits. First, you get access to the released new features. Updates also keep your website secure from any vulnerabilities out there.
Thus, it would be best if you always kept checking out for any site updates.
At MRK WP, we scan through sites under our Care Plan every week to check if there are any updates to roll out. We, therefore, create recurring tasks for these websites in our CRM. Assign them to the web administrators and ensure these updates are done weekly.
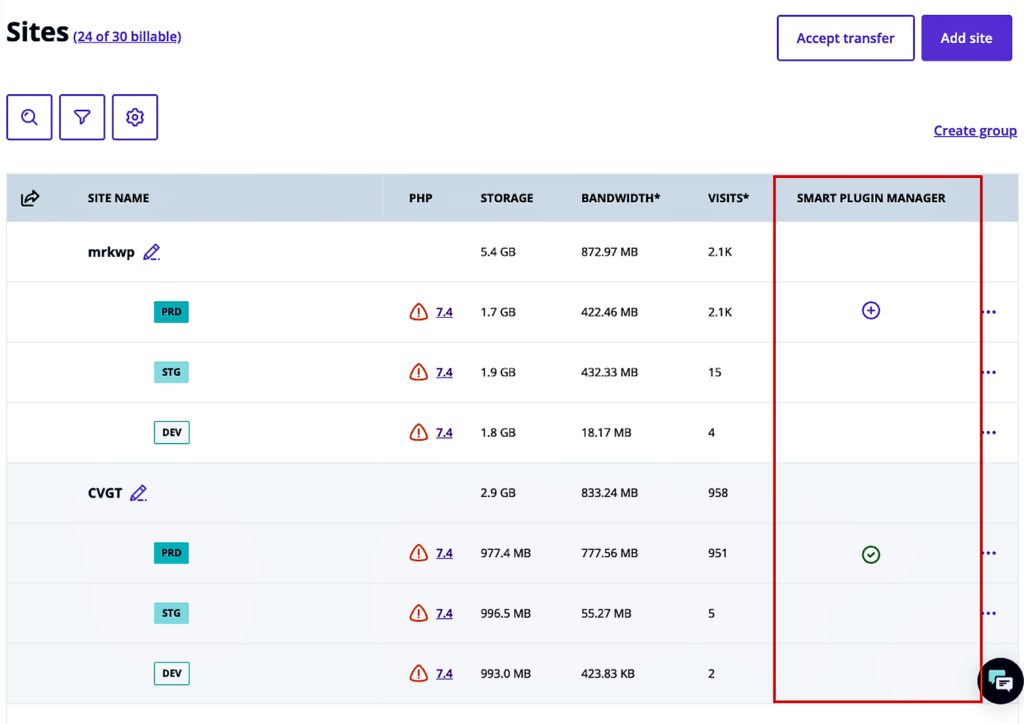
It would help if you also looked at the general Smart Plugin Manager status on the site’s page. This page shows you which websites need to be updated.
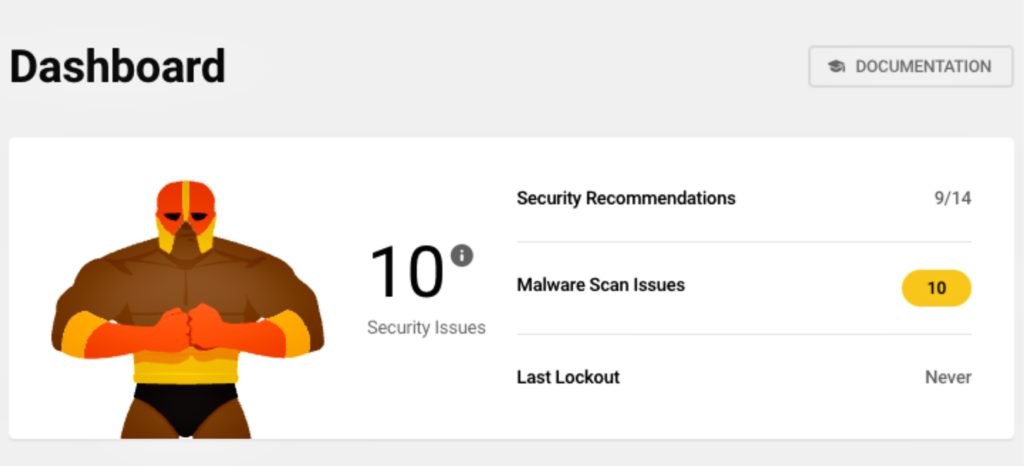
Our managed websites also have the Defender Pro plugin. The plugin regularly scans a site. In addition, it sends you an email notification if your site has a given outdated plugin version with a security vulnerability. This prompts you to update the latest plugin version with the fix. Defender Pro flags these on production and other site environments that have this plugin activated.
With these strategies in place, you will be in a position always to know what site requires updates.
2. Check whether the site has any work in Progress.
After identifying the site that requires updates, you must confirm whether it has any “Work In Progress” in a given environment. The main reason behind this check is for us to avoid rolling out updates on the Production yet the developers are working on a later version of the site in other environments.
At MRK, we keep track of sites that have “Work In Progress” by adding notes or fields on their current status. That is, inside the Zoho CRM-managed website record.
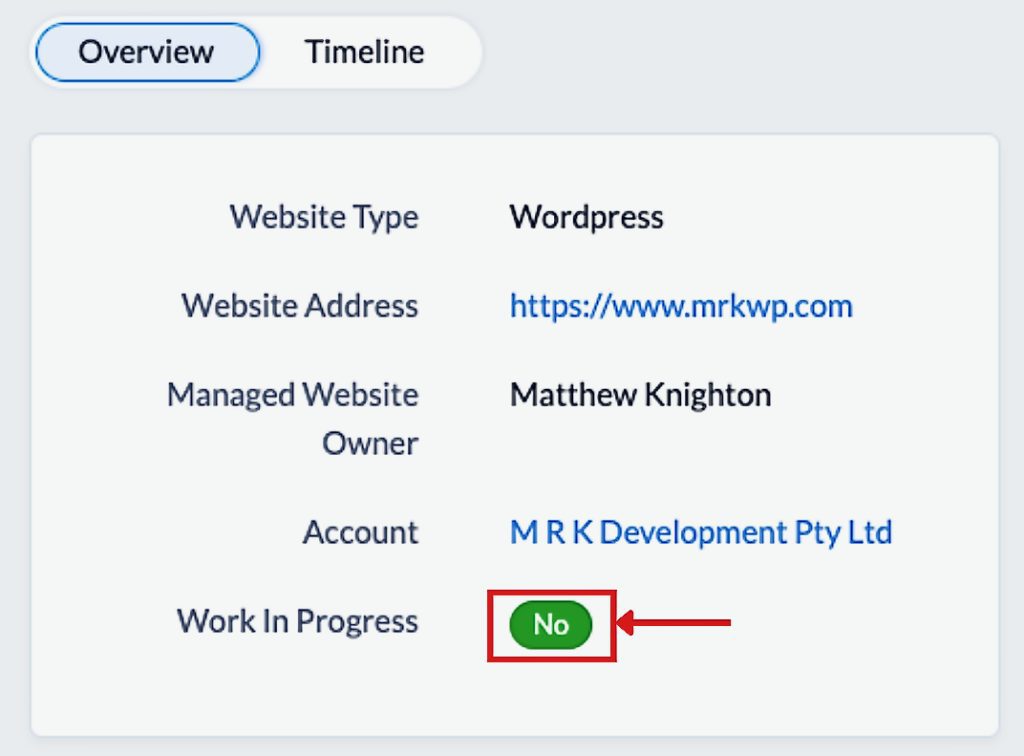
Here, we also ensure to take note of the environment in which the Work is being done. Again, this prevents anyone from overriding the “Work In Progress” in that environment.
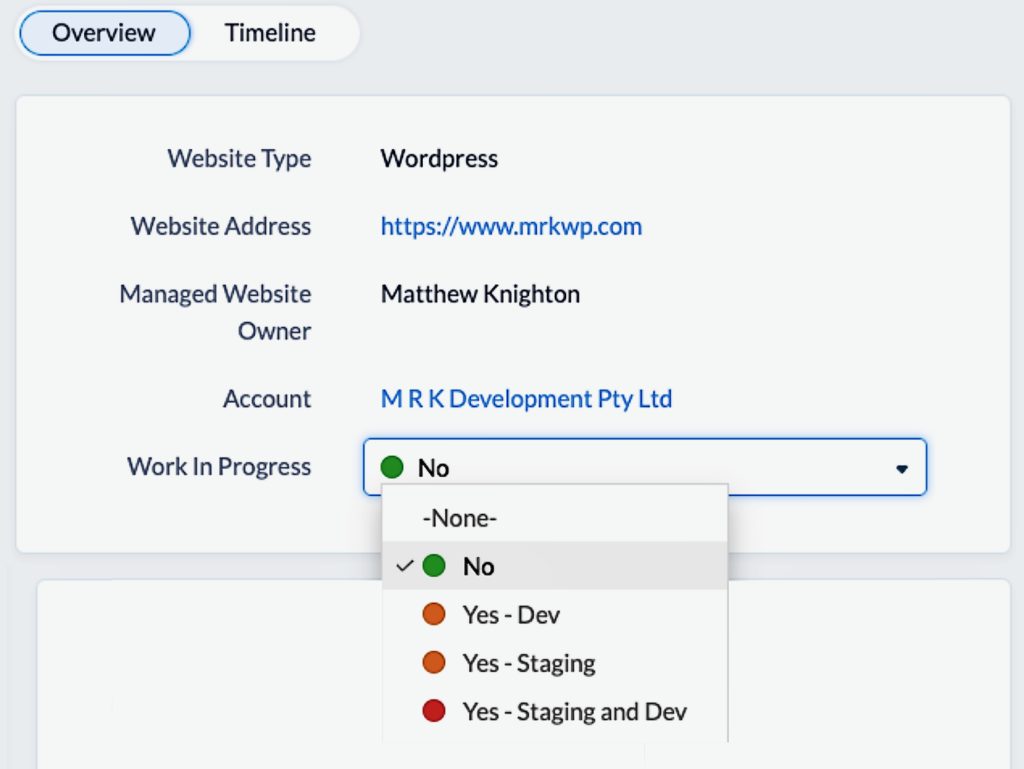
To carry out site updates, we should ensure that the site has no “Work In Progress”.
At times, the client may take some good time to approve the Work In Progress on staging, yet the site urgently needs updates. In this case, we recommend you use another environment such as development. To roll out and test the updates before rolling them out on the live environment.
3. Clone Production to Another Environment
As you recall, at the start of this lesson, it is not advisable to roll out updates on the production environment immediately. That is before testing these elsewhere, on either staging or development.
This leads us to our next step. We have to now copy the current version of the site on the production environment to either the staging. We could also use the development environment if staging has some other work.
If your site has all three environments, clone production to the staging environment to do the updates and testing. You could also clone to development in a case where the staging has “Work In Progress”.
If your site has two environments. That is Production and Staging or Production and Development. Use the secondary environment for updates and testing before rolling them to production.
To clone the live production to another environment, follow the steps below.
- Go to the Production Environment page of the site
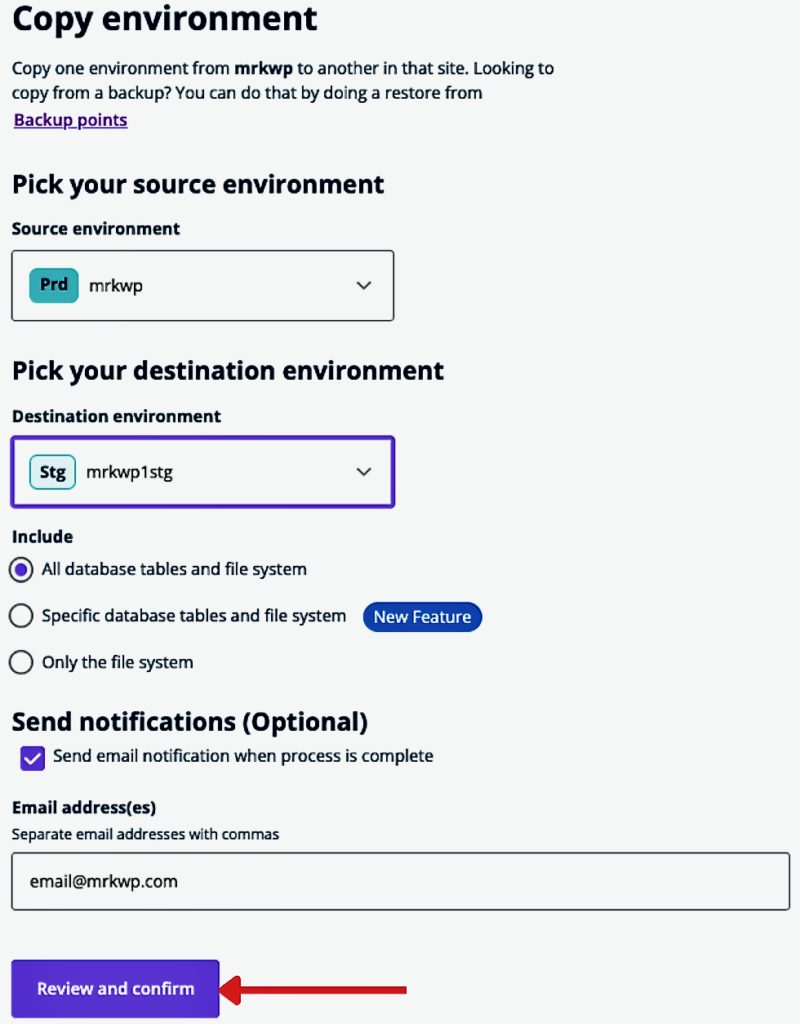
- At the top right-hand corner, click the ‘Copy Environment‘ button

- Fill in the Copy Environment form fields. These are
- Select the source and destination environments
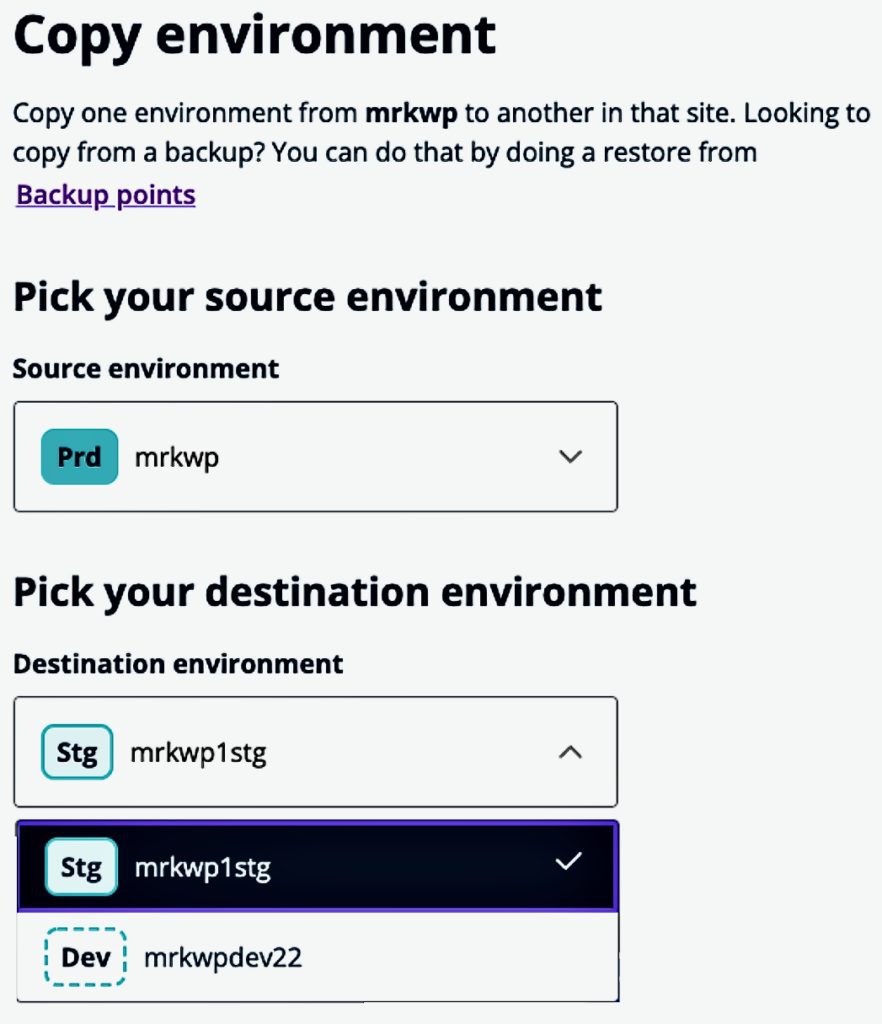
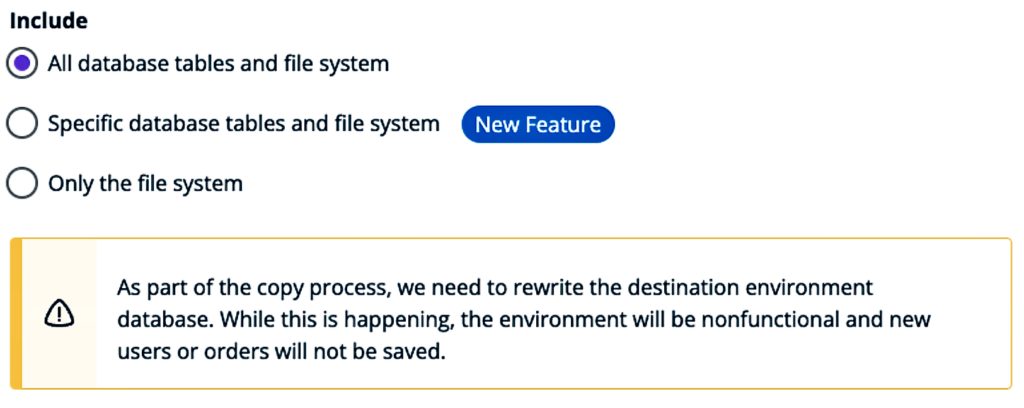
- What to include in the copy process. This could be;
- All database tables and file system – Default Choice
- Specific database tables and file system
- Only the file system
- All database tables and file system – Default Choice
- Email address to send a notification when the copying process is done.
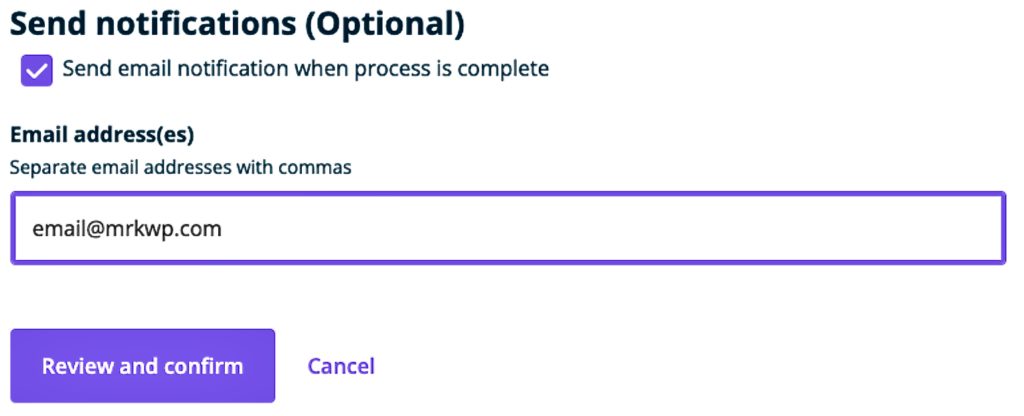
- Click Review and confirm.
- Review and confirm the details on the next page.
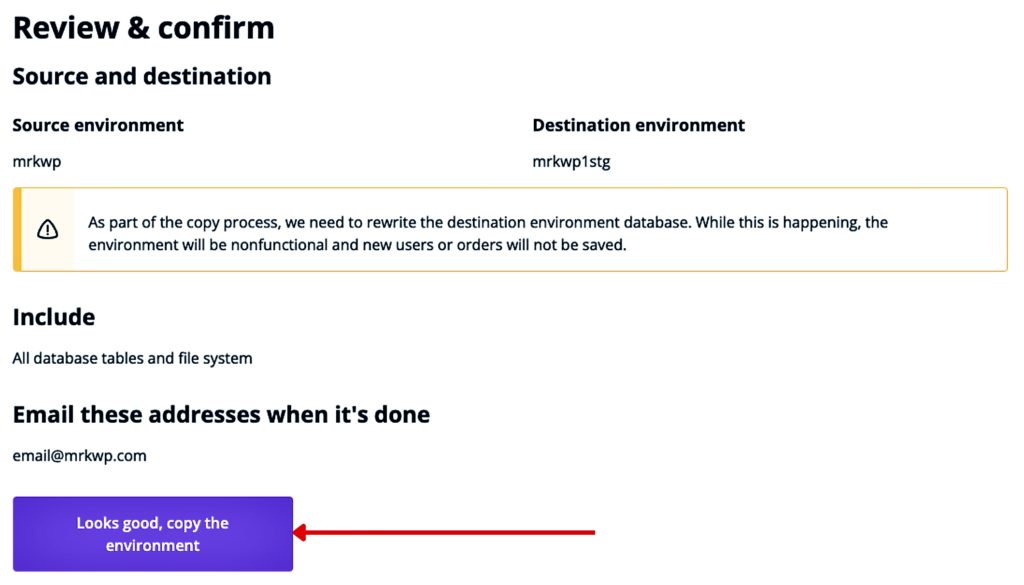
- Click the Confirm button to have the process started.
- When the copy process is done, you will receive an email notification.
Note
Here are some links to extra resources and documentation on how to clone environments in WP Engine.
4. Create a Backup Point before an Update
When doing site updates, you need to create backup points before updating an item on the site. These backup points enable us to restore the site to a given point. That is, in cases where we run a given update that ends up breaking the site. You, therefore, need to take backups at every point and not a general backup pre and post-update process.
In the steps below, we will learn how to create backups.
- Switch to the environment on which you are going to test the updates. This is the environment you have just cloned the production site to.

- Go to Backup points.

- On the Backup points page, go to Create a Backup.
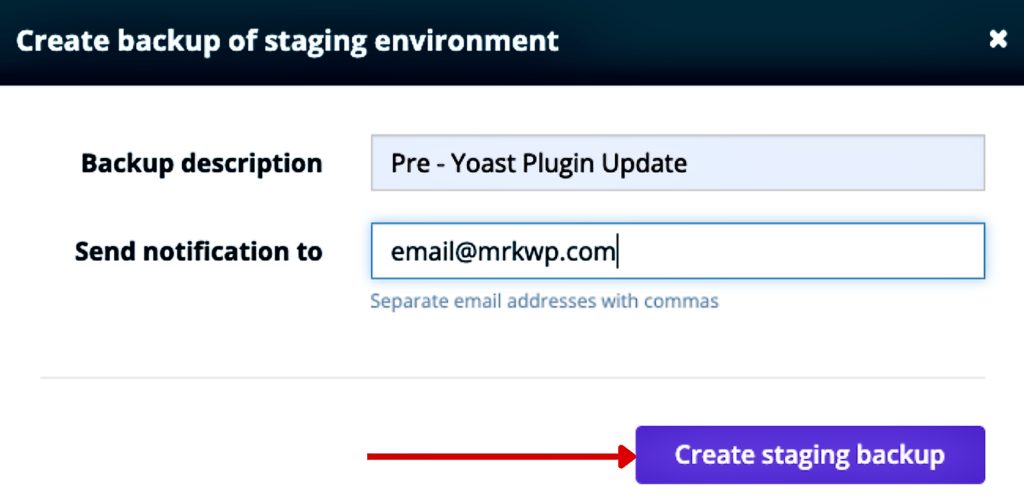
- A pop-up will appear. Fill in the create backup form. Submit the following details;
- Backup description, for example, “Pre – Yoast Plugin Update“. The backup description should be understandable to anyone.
- Email to send a notification when the backup point has been created. If you need to notify several emails. Add these while separating them using commas if you need to notify several emails.
- When done, click ‘Create Backup’ to start the backup process.
- WP Engine will send an automated email notification to the email(s) submitted above once the backup has been created. You also refresh the Backup points page to see the latest back that has been created.
5. Update Site item.
After creating our backup, we can move ahead with site updates.
Remember, we are using a testing environment first. That is either staging or development first. We will eventually roll out the updates to production later after testing.
To carry out an update, follow the steps below;
- Go to the Updates page via the WordPress Admin Dashboard.
- WordPress categorises updates into four types. These are;
- WordPress core updates
- Plugin Updates
- Theme Updates
- Translation Updates.
- Select one item to update from any of the categories mentioned above.
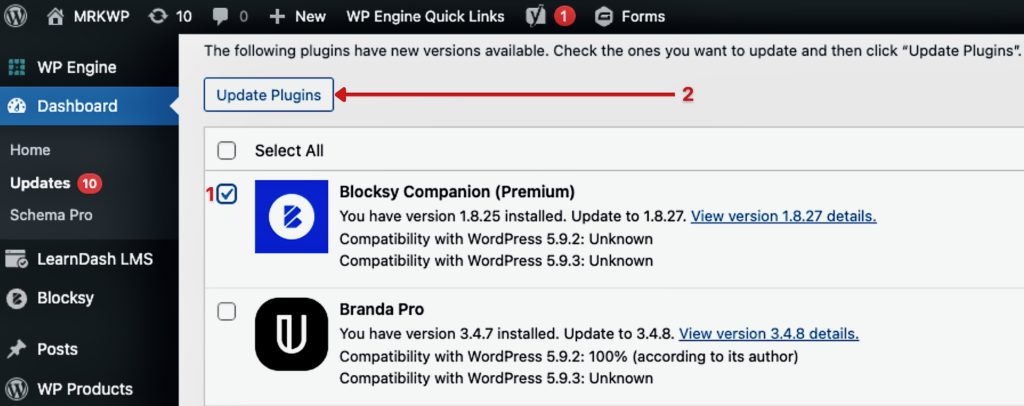
- Click on Update the link. WP Engine will be asked if you have created a backup inside WP Engine before starting the update (we have done this in step/topic 4)
- If you have covered step 4, click ‘No, I already did this‘ or else, go ahead and create a backup point as shown in Topic 4.

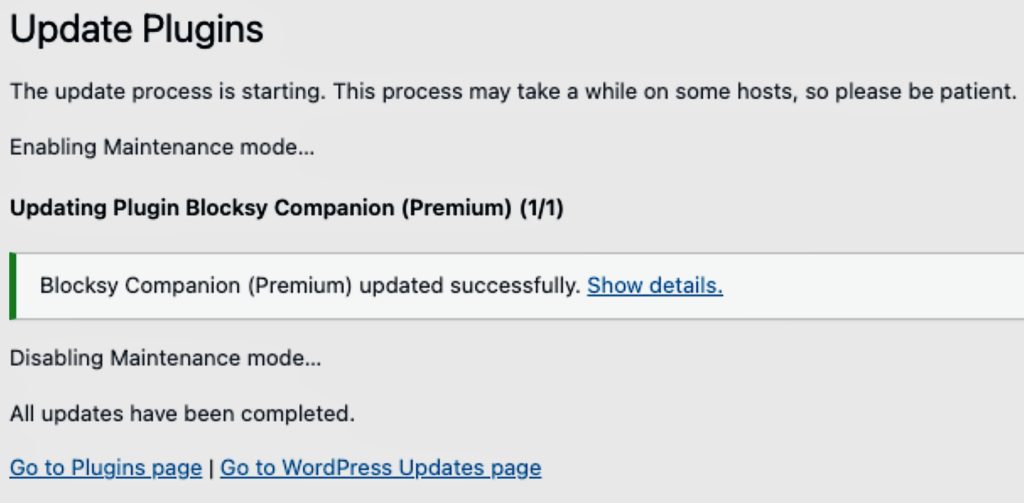
- The update for the selected item will start and you will be notified on the update page when it has finished successfully.
6. Testing the website after the Update
You need to test the website’s general functionality after each update. This ensures that nothing on the site is broken after that given update.
There are a couple of test cases you could establish for your sites. These are;
- Checking out the main pages of the site for any visual changes this page could be;
- Home page
- About Us page
- Contact Us page
- Blog page
- For the eCommerce site sample the following pages;
- Shop page
- Product category page
- Single product page
- Cart page
- Checkout page
- My Account page and any other pages
- You could go throw the site visitor’s workflow process. This ensures you walk through their experience to ensure the site is functioning as it should be. It would be best if you did this while comparing the testing environment site to production.
- In other cases, you to test the functionality of the updated item to ensure it’s working well after the update. For instance;
- If you have updated the site’s current theme, test if the theme customiser opens and works as expected.
- If you have updated the Smush Image optimiser plugin, upload an image and see if it gets compressed as expected
- You should test the plugin’s functionality to see if it works like the one on production that is not yet updated.
Note
When testing the updates in the testing environment, ensure to have the production environment open in another tab. This helps you to compare if there are any visual or process changes after an update.
7. Update other items on the site
Repeat steps topics 4,5, and 6 for any other items that need updates, that is;
- Create a Backup Point before an Update
- Update the site item
- Test the site after the Update
Do this until every plugin or theme on the site is up to date.
8. Final Touches On Staging
Having finished all the site updates. We have some final touches to do. In this step, we will;
I. Test the site
Do a general site check to ensure the site is running as expected in the testing environment.
If it is an e-commerce site, test the shopping process.
If it is a membership site, try to sign up as a user and log in.
You can do various tests depending on the nature of your website.
The aim behind this is to ensure that none of the updates has broken the testing environment site.
II. Clear cache
- If your site has a caching plugin such as WP Rocket. Clear the cache of the site.
- Clear WP Engine server-level cache.
9. Roll out Updates On Production
When all your tests have been successful, and you have confirmed that the staging site is error-free after the updates. You can now roll out these updates to the production environment.
On production, we also follow the procedure we used while updating the site via the testing environment. We, therefore, encourage you to follow steps from 4 to 8 for each item to be updated this time round in the Production environment. That is;
- Create a Backup point before doing an update
- Roll out the Update
- Testing the site after the Update
- Repeat steps 4,5, and 6 for any other updates.
- Test the production site after all updates are done
10. Create a Note on the Updates
To conclude this exercise, you should make a note of the updates you have made on that site. You could use your CRM or any other project management tools to make short notes or comments on the update activity. At MRKWP, we use Zoho CRM for this. In your note, you should provide the following information about the update;
- Date of rolling out the update(s).
- The updated items. These could be plugins, themes or WordPress core
- Link to the update task in your project management tool.
- Backup points on production are created during the process.
This marks the end of the process of doing manual site updates.
