Using WP Local with WP Engine
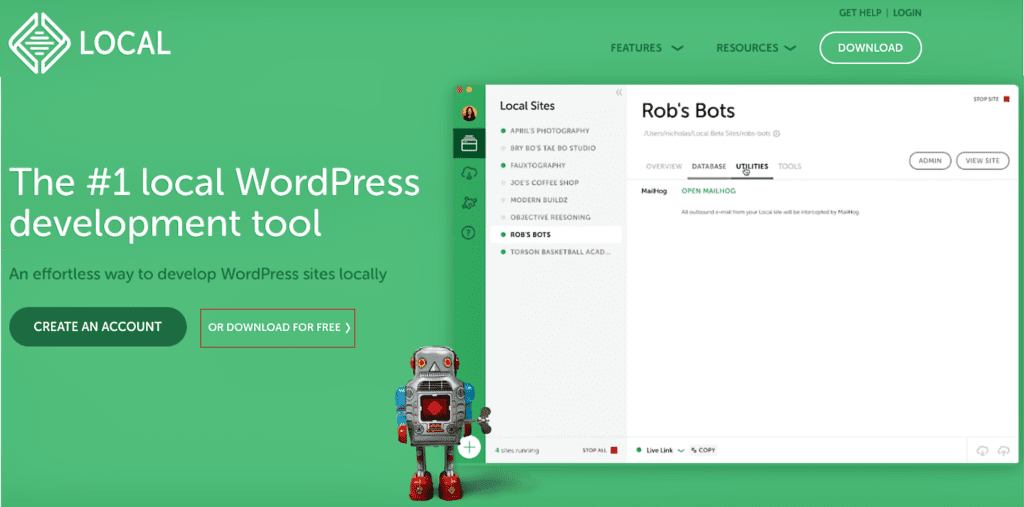
What is Local?
Local software lets you set up a local WordPress development environment on your computer.
It would be best if you had a faster testing environment for your website and its tools during website development and maintenance. A local development environment on your computer can serve this purpose. You can easily set up this environment with Local WP on your computer.
In addition, Local enables you to connect your live WP Engine site to the local site. The connection allows you to pull down any site files to your computer and push site files to the server.
In this guide, we will look at the following;
- How To Connect WP Engine to Local
- How To Pull down a site from WP Engine to Local
- How To Push Files from Local to WP Engine
Note
Here are some links to extra resources and documentation on using Local with WP Engine.
How To Connect WP Engine to Local
Making changes to your site(s) hosted via WP Engine is easy. Besides, the other two environments (staging and development) provided for rolling out and testing updates. With WP Engine, you can pull down your site to your computer using Local by Flywheel to make changes.
In this lesson, we will take you through connecting your WP Engine site(s) to Local.
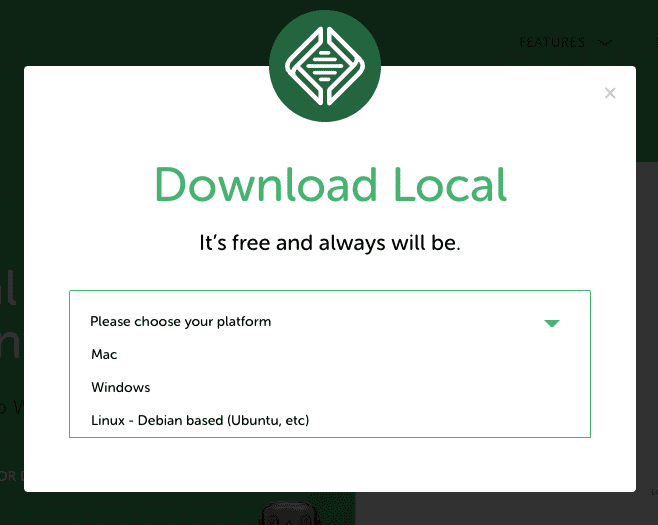
1. Download Local
- Visit the Local home page and select “Download for Free”.
- Choose the operating system you are using.
- Fill in the signup
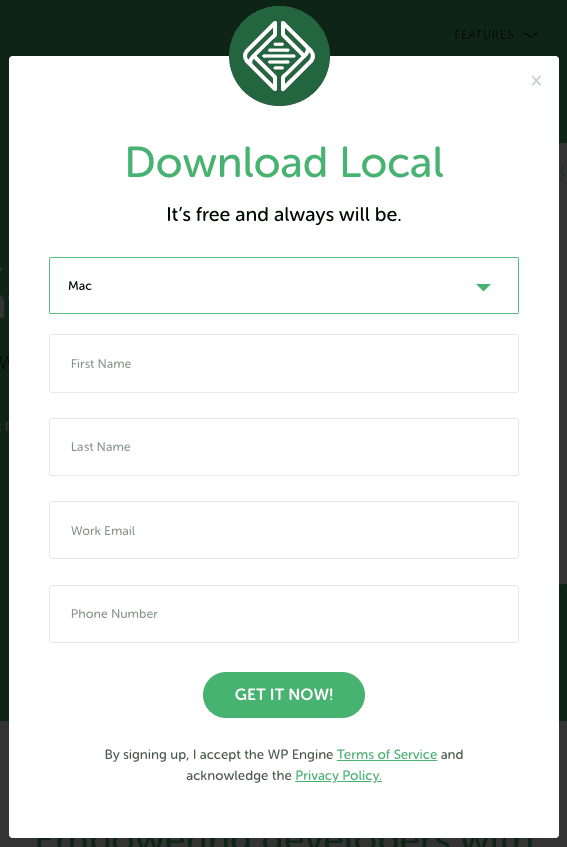
- Click “Get it Now.”
- Your download will start after that.
2. Install Local on your computer
Using the downloaded setup, install Local on your respective operating system.
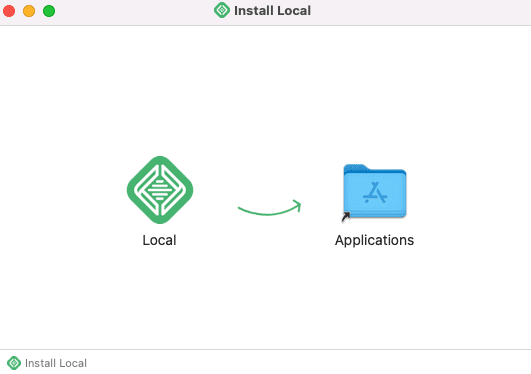
When done with the installation, launch the application.
3. Connect Local to your WP Engine
Go to the Connect Page on the Local application to connect Local to WP Engine.

Then, click “Connect To A Platform”.
Local can connect to two hosting platforms
- WP Engine
- FlyWheel
In this lesson, we will be connecting WP Engine host to Local.
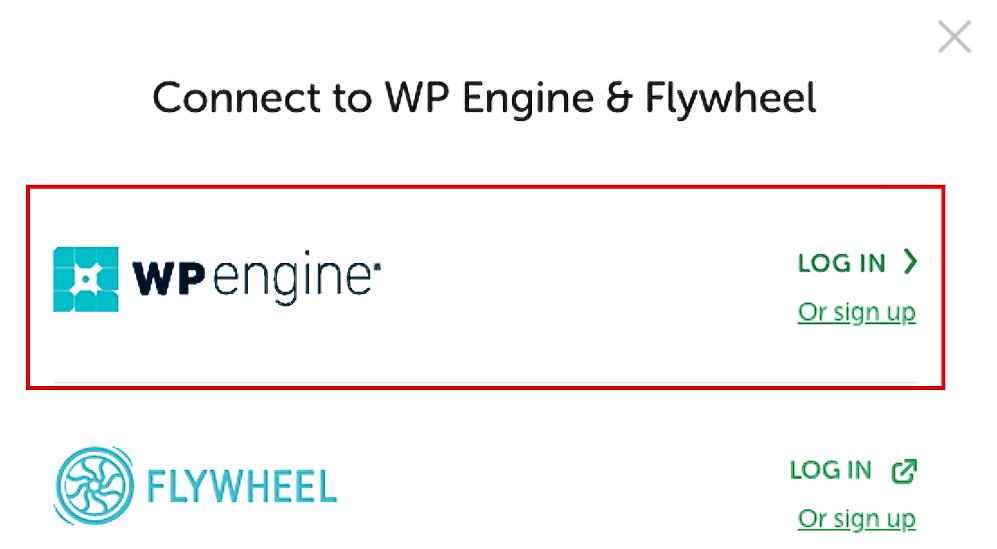
Click “Log In” on the WP Engine option.
To connect your WP Engine to Local, you need to have the following credentials;
- API Username
- API Password

To get these credentials, log into WP Engine and go to the API Acess Page.
Note
To generate these credentials. You enable API access on your account.
After verifying the API credentials, local will establish a successful connection to WP Engine. A list of all your sites hosted via WP Engine will display on the Local Connect Page.
Note
Here are some of the links to extra resources and documentation on how to connect WP Engine to Local.
How To Pull down a site from WP Engine to Local
After connecting Local to your WP Engine, you will have access to all your WP Engine sites on your Local.
To pull down a site, you can follow the following steps.
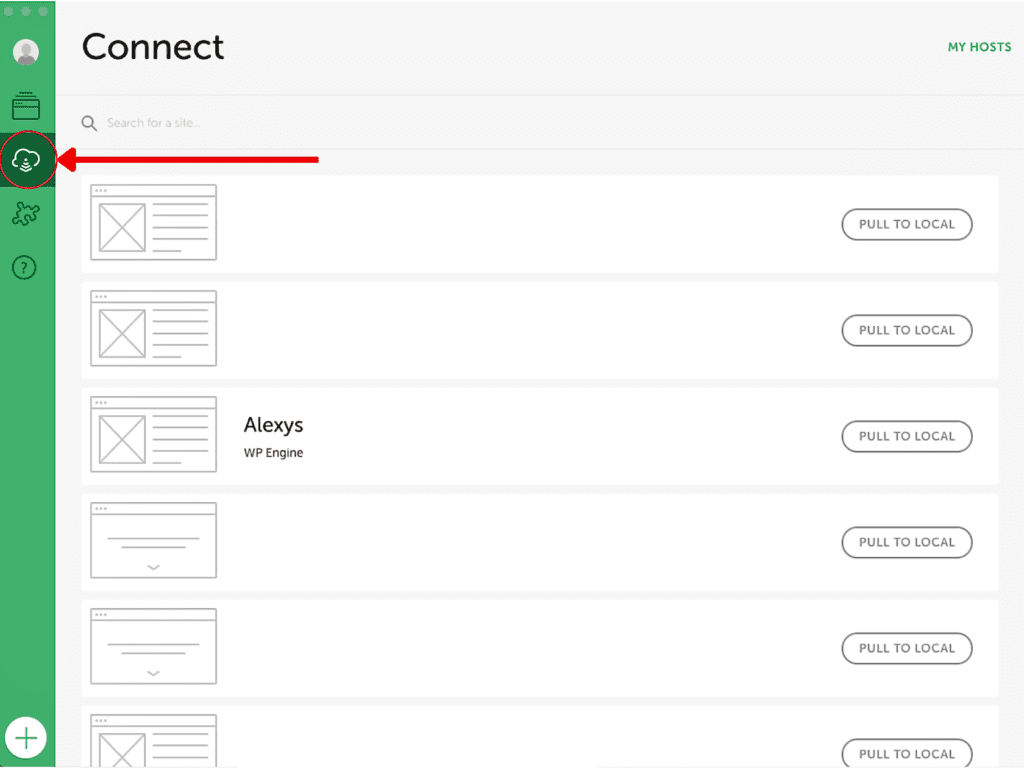
1. Go to the Connect Tab in your Local
Launch the Local application on your computer. Click on the “Connect” tab to open the Connect page.
You will see a list of all your WP Engine sites on this page.
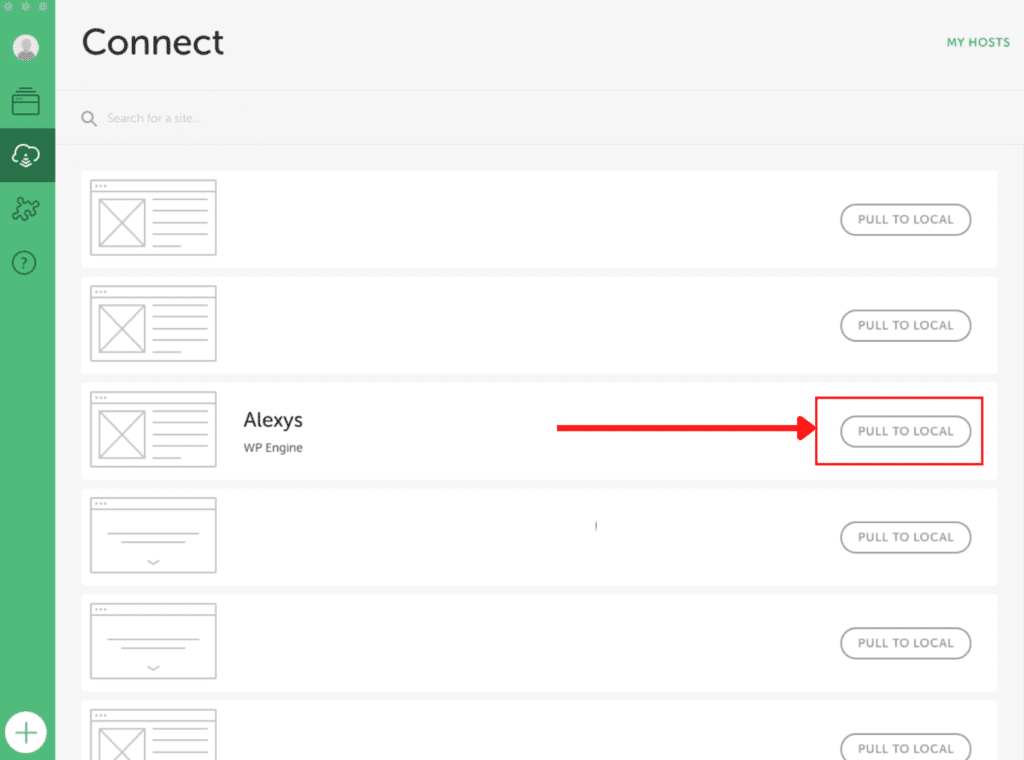
2. Select the website to pull down
Look through the listed sites and select the site you would like to pull down to local.
Then, click the “Pull To Local” button.
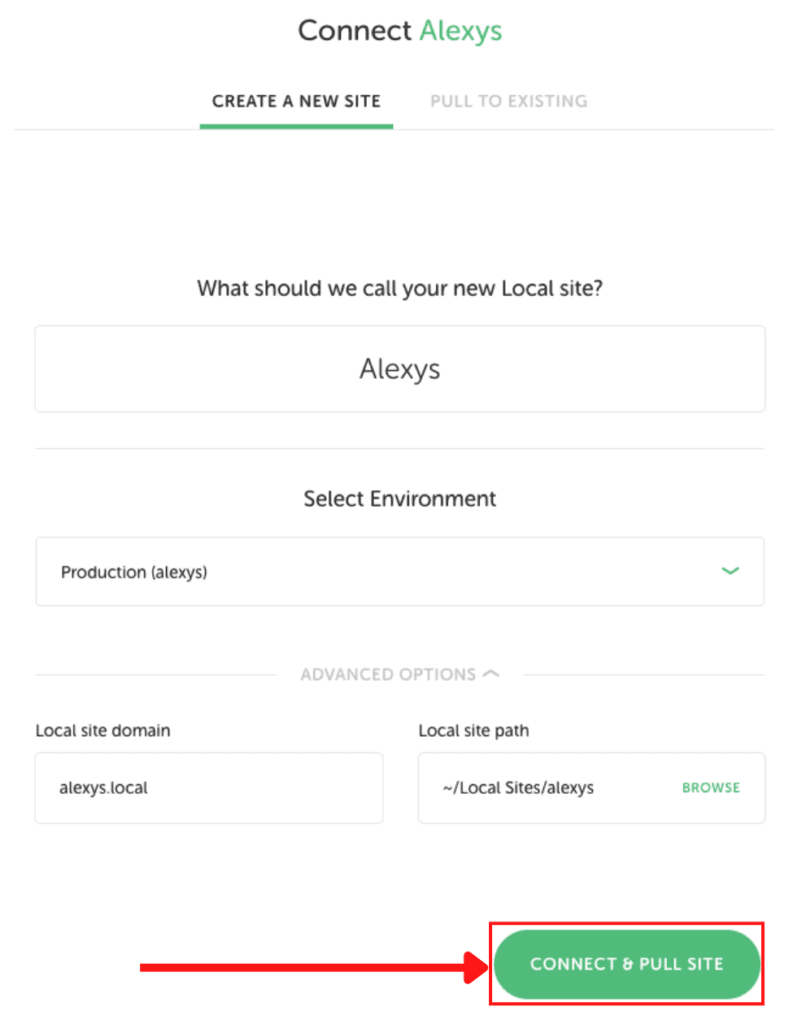
3. Fill in the Form
On this form;
- Fill in the Name of the local site.
- Usually has the site name auto-filled by default.
- You can choose to give the Local site instance a different name.
- Select the site environment to pull down.
- The dropdown of environments is dependent on the environments associated with the selected site via your WP Engine Portal. Suppose the site has two environments on WP Engine. Local will provide you with only two environment options to pull down.
- You can pull down any site environment that is Production, staging or development.
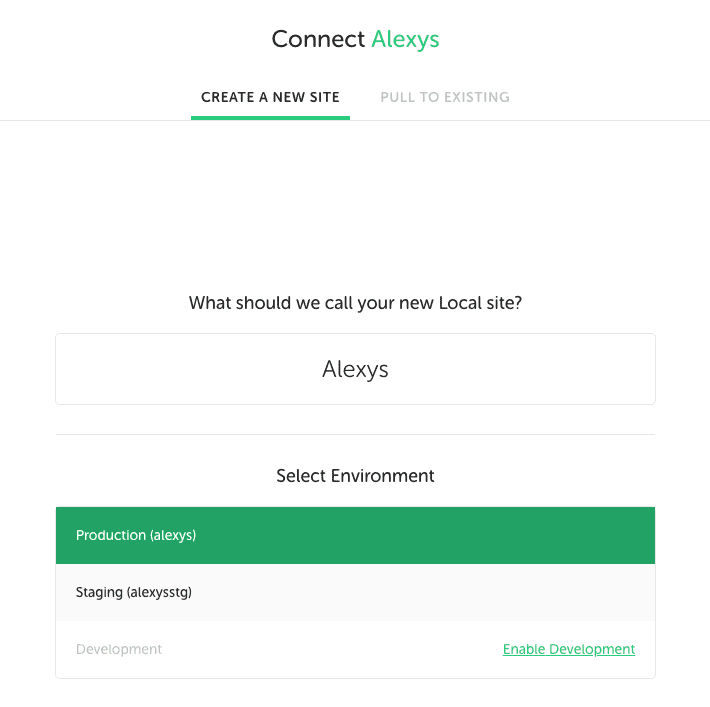
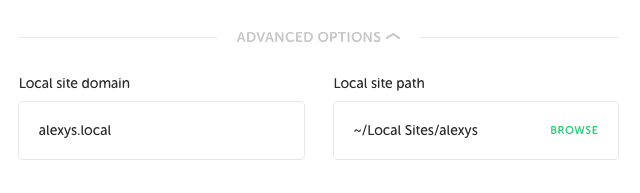
This form also provides advanced options. They let you set some configurations before pulling down a site. These are;
- Adding the Local Site domain
- Setting the Local Site Path file location on your computer
You can leave these fields with their default values.
4. Connect and Pull
After filling in the form, click the “Connect and Pull Site” button to start the site pulling process.
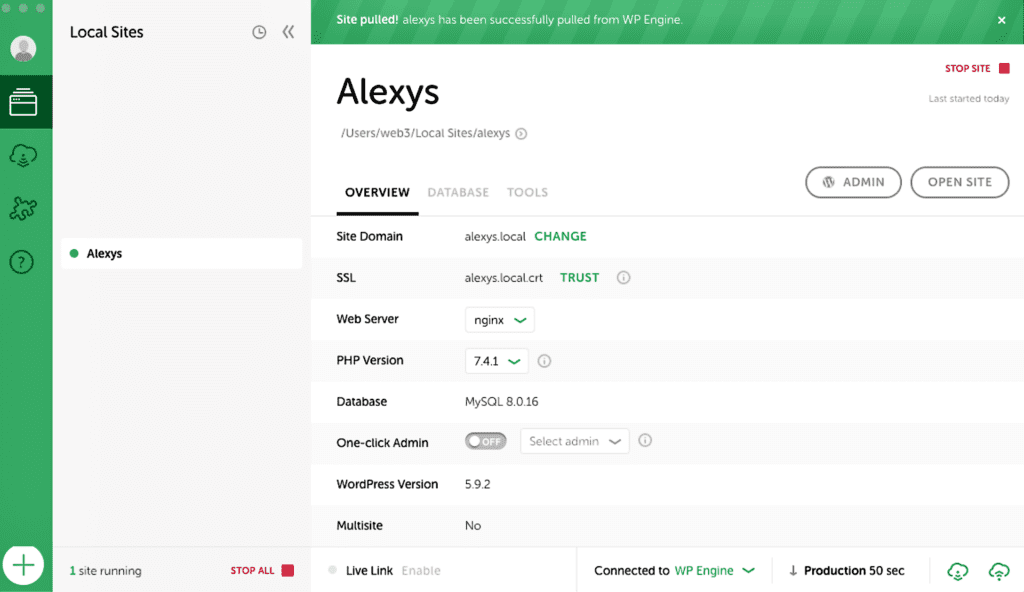
The local overview page will appear when the site has been completely pulled down.
Note
Here are some links to extra resources and documentation on pulling a site from WP Engine to Local.
How To Push Files from Local to WP Engine
We usually make changes to our custom plugins and theme during site maintenance. These changes are generally done in the local site’s environment. After testing and trying out the changes in the local environment, we push them to the WP Engine server.
To push files to your WP Engine site, follow the steps below.
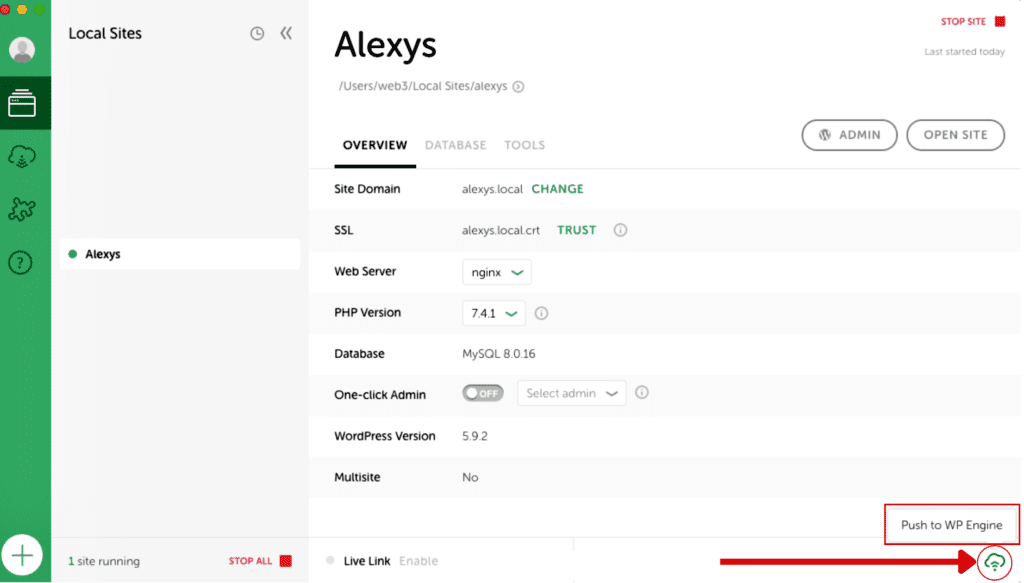
1. Go to the Site Overview page.
Launch the Local application on your computer. Select the Local site you would like to push files to on the server.
Go to the bottom right corner and click the “Push” icon.
2. Fill in the Push Form
At this step;
- Select the environment you would like to push files.
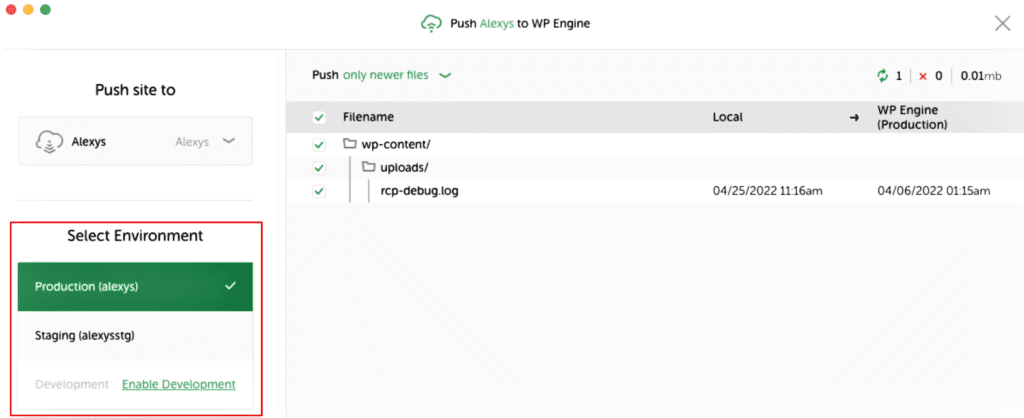
- Select the files you would like to push/upload.
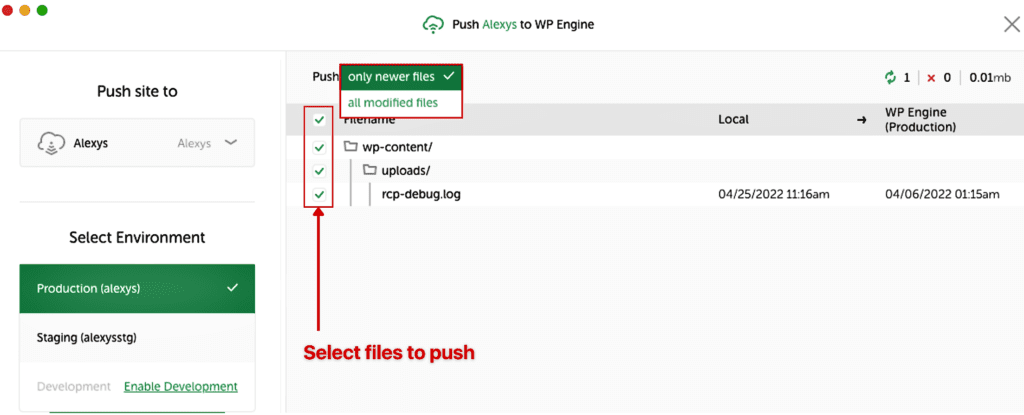
Local has a feature called Magic Sync. This feature detects file changes between your site on Local and the selected site environment on WP Engine. With Magic Sync, you can view two types of files before pushing them to the server. To do this;
- Click on the Push drop-down,
- You can choose to display either
- Only newer files or
- All modified files
- Select the individual files to push by using the checkboxes.
- You can choose to display either
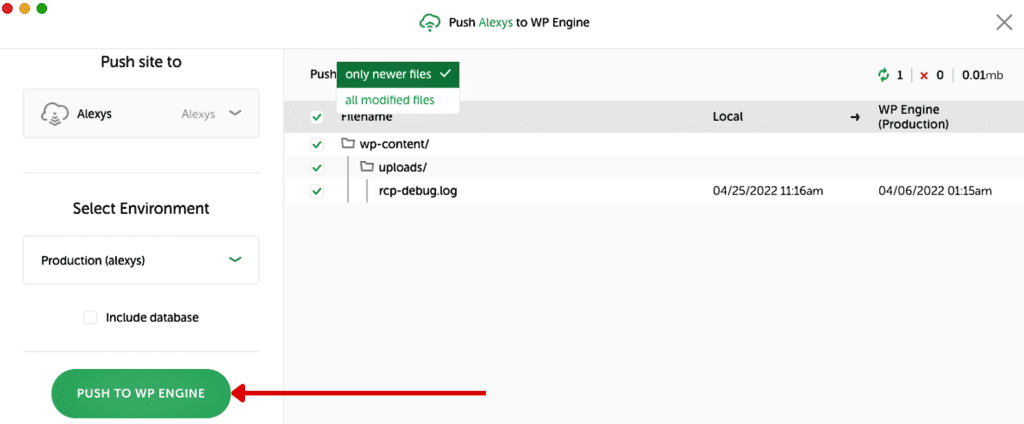
3. Push the files to WP Engine
Click the Push To WP Engine to have the files pushed to the server.
Note
Ensure to create a backup of the site environment before pushing the files. WP Local usually triggers this backup on your Engine automatically. To be extra cautious, create a manual backup point before pushing the files to the server.
The site uploading process will start.
At completion, you will see a notification at the top of the page informing you the files have been pushed to the server.

Note
Here are some of the links to extra resources and documentation on how to push files from Local to WP Engine.