How to edit your footer in Divi Theme
Getting the Most Out of Your Website Footer
The Divi footer makes use of sections and widgets in your WordPress Theme Customiser tool. This is not the Divi Visual Builder.
This means it can seem hard to find for the basic Divi Theme user. What makes this difficult is the footer area does not use the Divi Page Builder tools. All the modules and sections you are used to cannot be used. The footer makes use of WordPress widget tools used to populate widget areas (sidebars).
In this set of simple tutorials, we show you, step by step, how to make simple edits to make great footers.
Table of contents
- Getting the Most Out of Your Website Footer
- Do you want to use the visual builder in your Divi footer?
- The 3 Parts of the Divi Footer
- How to Edit the Divi Theme Footer
- Step 1. Theme Customizer
- Step 2. Customizing Footer
- Step 3. Customizing Footer Layout
- Step 4. Customizing Footer Widgets
- Step 5. Customizing Footer Elements
- Step 6. Customizing Footer Menu
- Step 7. Customizing Bottom Bar
- Wrapping Up
- Use a Divi layout in your Footer
Do you want to use the visual builder in your Divi footer?
You can make use of Divi Library items by using our Footer Plugin for Divi. Download it and make even more amazing footers with Divi Theme.
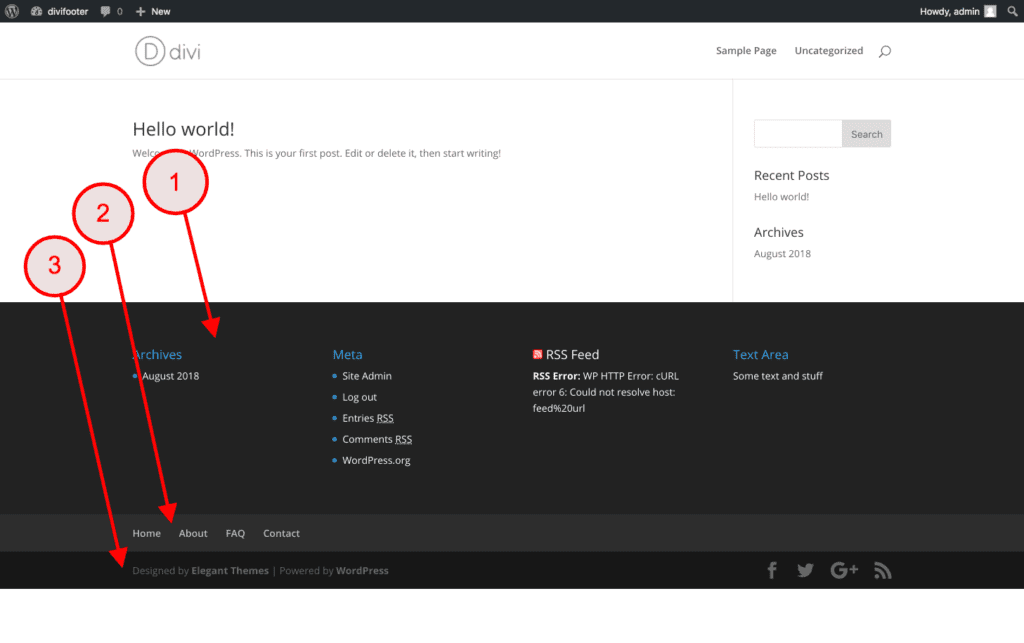
The 3 Parts of the Divi Footer
The Divi Footer is comprised of three parts:
- The Widget Area
- The Footer Menu
- The Bottom Bar
The Widget Area and Footer Menu are completely optional. These sections are easy to hide and do not need to be visible on your website. It’s possible to remove the bottom bar also but does need some custom code to do so.
You can manage the Divi Footer via the WordPress Dashboard in either the Customiser or Appearance menus.
How to Edit the Divi Theme Footer
Step 1. Theme Customizer
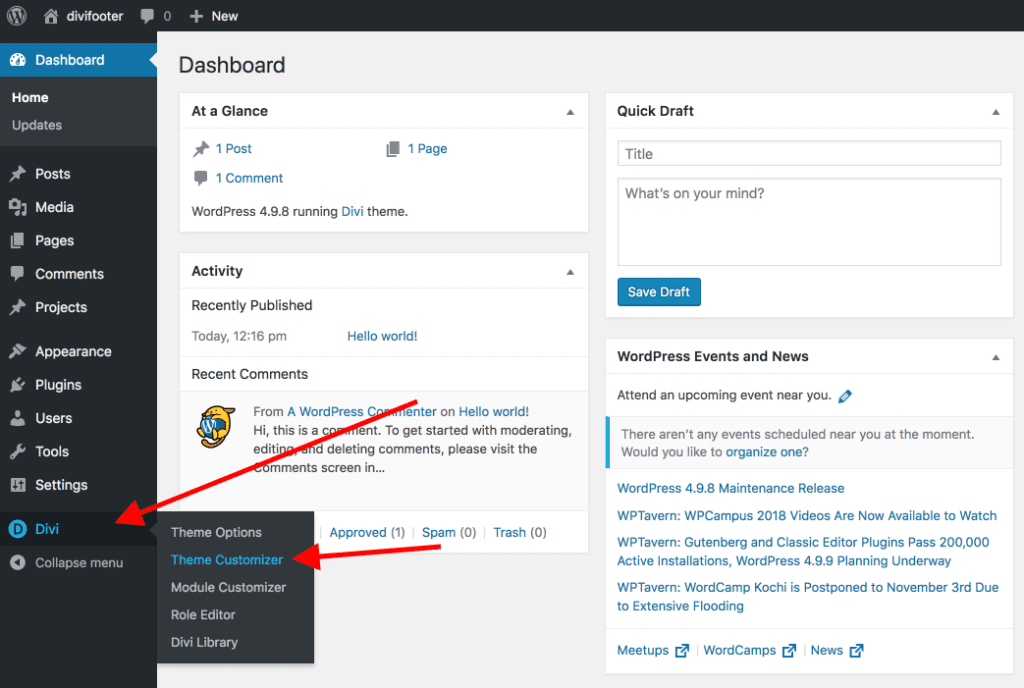
Go to the Theme Customiser. You can access the Theme Customiser from two different areas on your WordPress Dashboard. Both will take you to the same page.
The first option is to select Divi > Theme Customizer from the main left-side menu (as shown in the screenshot below).
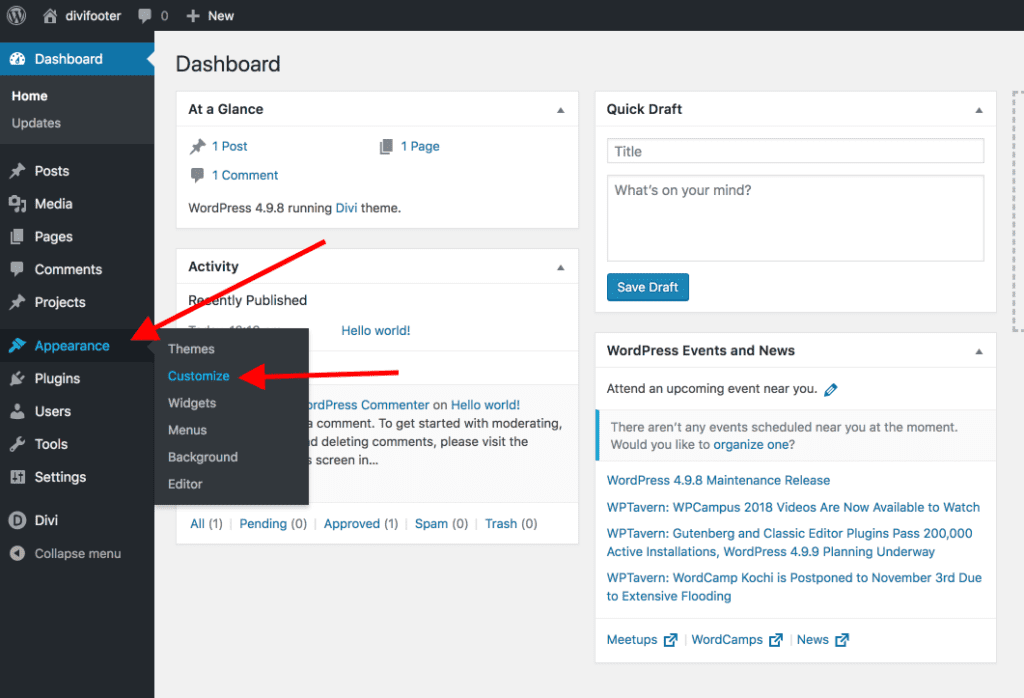
Alternatively, you can select Appearance > Customize (as shown in the next screenshot).
Step 2. Customizing Footer
Once you are inside the Theme Customizer, select Footer from the menu list. Here you can edit the basic setting for the default Divi Footer.
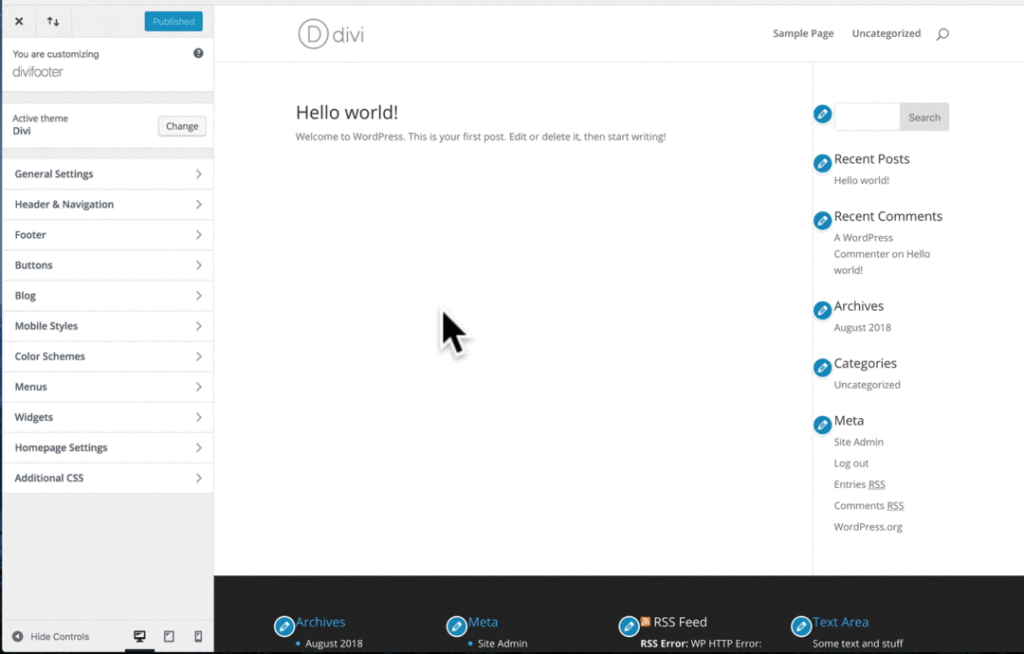
Once you are inside the Footer menu, the Theme Customiser will give you five ways to set your styles. Note: the actual content for these settings is handled inside the widgets themselves. More on this later.
- Layout – Use this to control your number of columns.
- Widgets – Controls how your widgets appear and what colors are used for the widgets.
- Footer Elements – Use this to control your Social Media Icons.
- Footer Menu – Use this to place a horizontal footer menu between the widget area and the footer bar.
- Bottom Bar – Use this to control the copyright information. It allows you to enter HTML.
Step 3. Customizing Footer Layout
The Layout menu is where you can change the column layout and the background color of your footer. Note these settings only apply to the Widget Area of the footer.
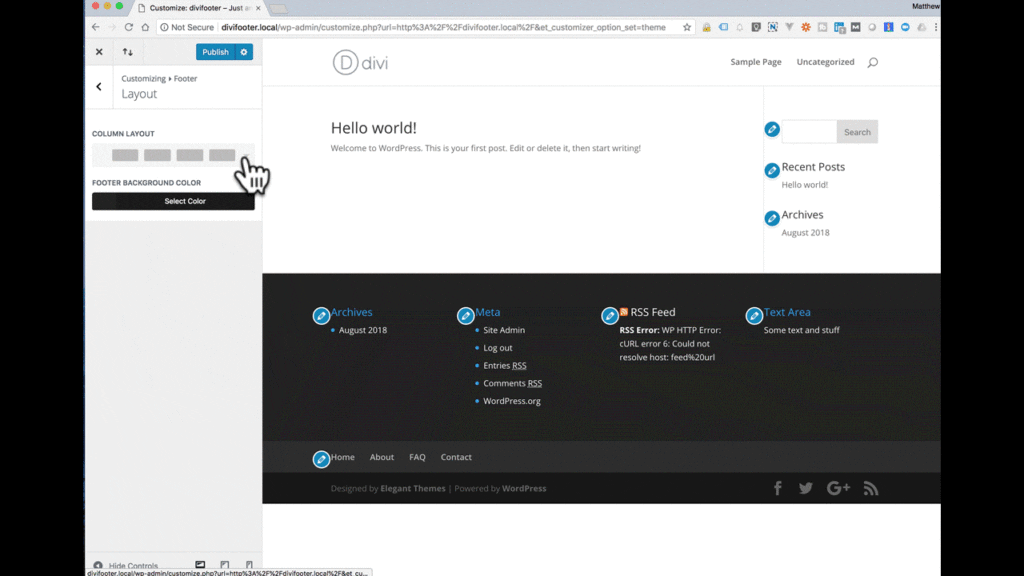
As you can see in the above animation, the positioning of the Widget Areas can be controlled within the Layout option. Column Layout Options do not impact The Footer Menu and Bottom Bar.
In contrast, the Footer Background Color selector will change the entire background color of all three footer areas.
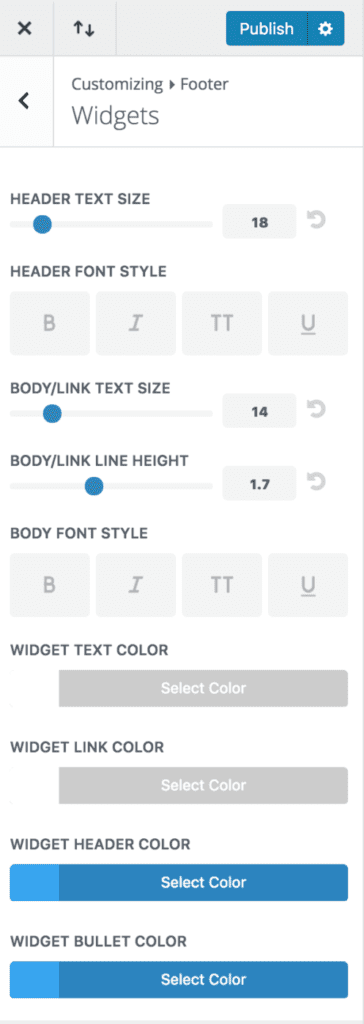
Step 4. Customizing Footer Widgets
The Widgets menu is where you can edit the Header, Text, and Link styles and the Bullet Color. Play around by changing your header size, link color, bullet color, etc. Changes made here will only apply to the Widget Area of your footer. As mentioned before, the content of a Widget is managed in the Widget itself.
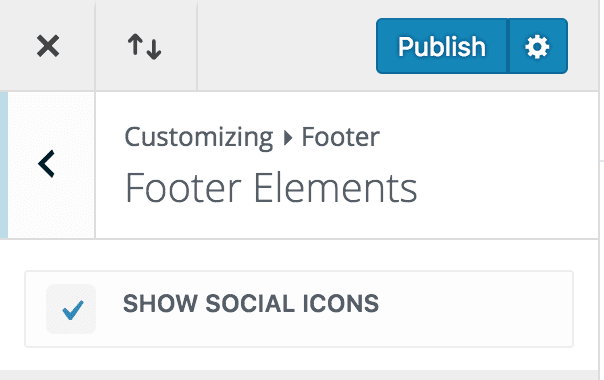
Step 5. Customizing Footer Elements
The Footer Elements menu controls the display of Social Media Icons.
All you can do is either choose to show the icons or hide them. If you do want to edit the social media items and the links shown, you need to go back to the Admin Dashboard and open Divi > Theme Options.
At this point, you may start to realise that Divi is missing a number of other social networks. If you want to add more social media icons, you can look at the Divi Marketplace – Divi Icon Party Plugin. This will add 34+ additional social media options!
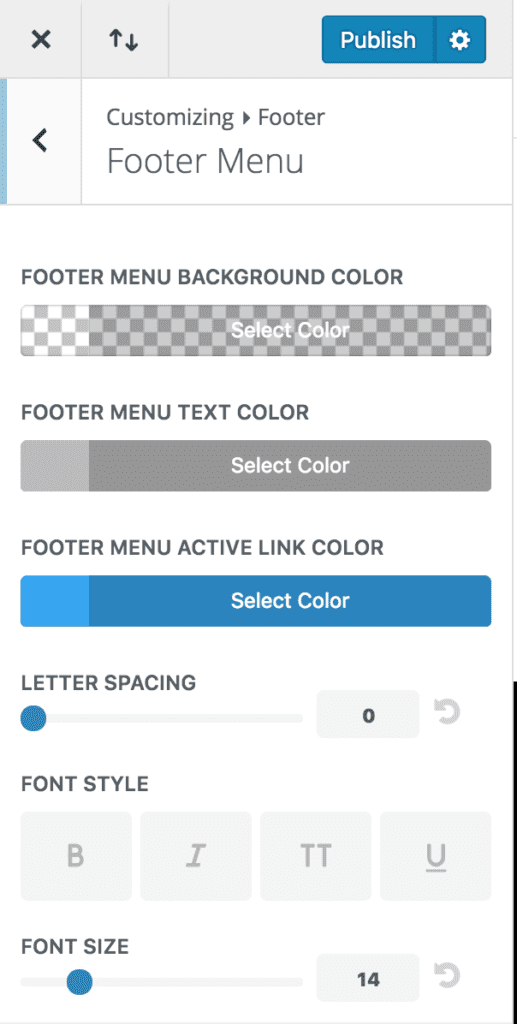
Step 6. Customizing Footer Menu
The Footer Menu is where you can control the text and color styles of your footer menu. It’s important to ensure your menu is easily identified as a menu to your users. Adding a footer menu is a good idea. Popular links to include in a footer menu are “Terms and Conditions” and “Privacy Policy”.
Note
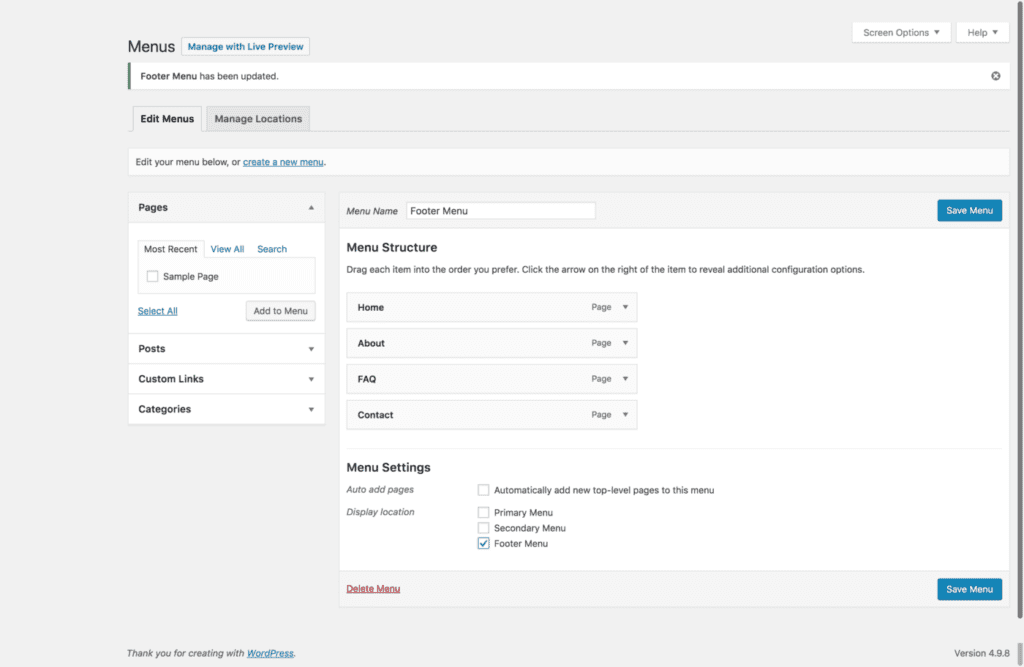
If you haven’t allocated a ‘Footer Menu’ (in the Menu Settings), you won’t be able to see the footer menu or any changes you make to these settings. To go ahead and assign a menu, go to the back of your WordPress Dashboard and select Appearance > Menus.
In the Edit Menus tab, select a menu to edit or create a new one. Give it a name to make it easily identifiable, for example, ‘Footer Menu’. Once you have selected or created your menu, make sure you tick ‘Footer Menu’ in the Display Location. This ensures the menu will become visible (see the screenshot below). Save your changes. Now refresh your webpage to see the menu in your footer!
Now you have the Footer Menu under control, the last element you are left with is the Bottom Bar.
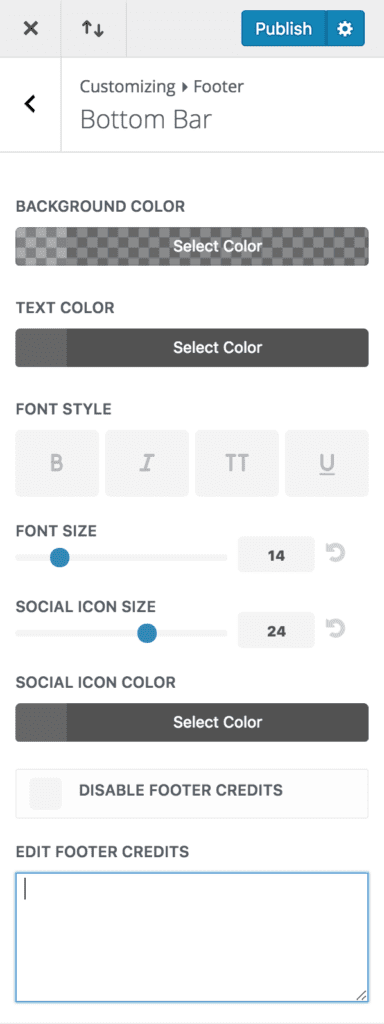
Step 7. Customizing Bottom Bar
The Bottom Bar display’s at the very bottom of your footer. It appears on every page of your website. Here you can edit the bar background color, text styles, and the social media icons color and size.
You can also choose to enable or disable the Footer Credits in these settings by ticking or unticking the box. By default, the Footer Credits display a link to Elegant Themes. Some users get stuck on how to edit this text. As you type text into the Edit Footer Credits box you will immediately see the text updating in the footer. You can also add HTML in this area to create links.
Wrapping Up
As you can see, the Divi Footer styling options are all nested outside of the typical Divi Builder pages inside the Theme Customizer. The Divi Theme uses this method as standard WordPress implementation. Most WordPress themes also make use of Widgets and the Theme Customiser for editing footer styles.
Use a Divi layout in your Footer
The good news is if you want to use a Divi Layout in your Footer, you can with one of our free plugins. You can download it directly on the WordPress.org repository or get it here on our website. There is also a premium version with extra features if you wish to upgrade after trying the free version!
Frequently Asked Questions
How can I remove the Elegant Themes link from my Footer?
Go to the Theme Customiser.
Open the Footer Menu. Select the Bottom Bar Menu Option. Enter your new footer text in the Edit Footer Credits text box.
Can I hide the footer on specific pages?
The Default footer cannot be hidden once it is set. It’s a global item. If you want to change the footer based on page types you will need custom code. If you want to use Divi Library items then the Divi Footer Plugin will help you.
How can I add more social icons to the Divi Footer Bar?
The best way to do this is with a plugin. The Elegant Theme Marketplace has a great plugin – Divi Icon Party This has 34 extended icons. For more icon flexibility, try WP and Divi Icon Pro, this adds 3400 icons to Divi.
Note: these are affiliate links. We get a small kickback if you happen to purchase one of these products at no cost to you. We were not paid to add these links to our site.
How can I edit the social footer links?
In the WordPress Dashboard, go to the Divi > Theme Options. Scroll down and you will see the ability to show or hide each social media item along with a text box for adding your link.
I have another question that isn’t answered here, what can I do?
Send us an email and we will generally respond within 1 business day. We like to know questions people have so we can answer them here.